|
|
 |
|
|
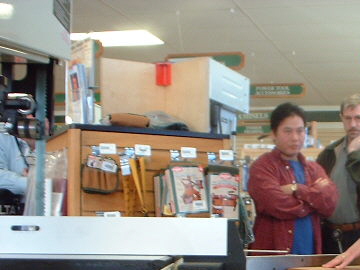
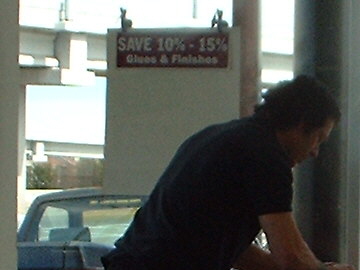
On March 6, 2004 the Austin Woodcraft store hosted David Marks, award-winning woodworker and the star of the DIY Network's Wood Works TV show. David
was making a grand tour of all of the Texas Woodcraft stores and spent a total of 5 hours presenting to a standing-room-only crowd of about 75 people.
I took some pictures and madly scribbed notes as David went through each part of his presentation. As he started, he seemed a little nervous, but as he got into the swing and the crowd made it's respect for his work evident, he relaxed and I think had as good a time as we did. My notes don't strictly follow the timeline of the presentation because snippets of genius came out all through the day. This page is longer than most on my site because I want to make sure I get all of his wisdom preserved for eternity!
|
|
|
|
I encourage you to read all the way to the bottom as some very interesting news about the show is disclosed!
David started out by simulating the construction of a curved lid for the treasure box he did on his show using multiple laminations of "Italian bending poplar" for the core, followed by a veneer of the
finish wood on the top and bottom..
He explained his vacuum press technique and that he has even made his own systems for very large pieces. The bags are formed by sanding then gluing the edges of plastic sheeting, then making the "platen" by scoring grooves in each direction on a piece of plywood. The grooves allow paths for air to be evacuated from the bag. In a perfect vacuum, you would get 14.7 X 12 X 12 = 2116 pounds per square foot of pressure, but in reality these devices get around 1500 psf. This is hard to get using simple clamps and works especially well for curved pieces.
|
|
|
|
|
|
Next up was an extensive treatment of scraper sharpening. First, lap the side of the scraper flat on a waterstone. He uses several grades of stone, starting with 800, then 1200, 6000 and finishing with
8000. Then, using a small block of wood with a true 90 degree corner, lap the edge on the stone at each grade.
He burnishes (creates a hook on the edge) by running a screwdriver or similar tool along the edge. David uses a dedicated burnishing rod for best results due to its hardended steel. It seems like a lot of work, but David can get 10-12 burnishings for each lapping. He reminds us not to put an excessive amount of effort into sharpening, as the goal is to finish the project, not sharpen all day!
Next came chisel sharpening.
He starts by hollow-grinding the chisel on a grinding wheel as it reduces the amount of metal you have to remove to create a sharp edge. He uses the same waterstones as for scrapers, laping the back of the blade flat first. He then laps the bevel using his fingertip to apply pressure, pivoting the chisel until the face is flat against the stone. He holds the chisel at a 45 degree angle to the stone to avoid wearing channels.
|
|
|
|
|
 |
|
|
|
Next up was resawing. Most of us are too intimidated to even try it, or have tried it and have had disastrous results.
At the urging of the crowd, David walked us through the critial steps of wood prep and bandsaw setup, ending with the desired result.
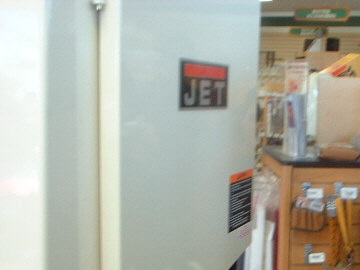
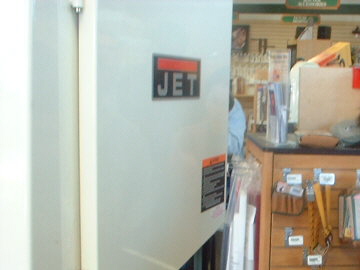
David started by tuning the bandsaw.
The key is to determine the natural tracking angle of the blade and shift the fence to match it. David prepped a mahogany board by running it over the jointer - this gives a straight and clean edge to run along the fence so the only variable is the tracking of the blade. It turned out that the stock blade on the store's Jet 18" saw (same one I have, driveby gloat) was off by about 3-4 degrees.
After tuning, David shaved a perfect 1/16" slice off the mahogany block, thinner than he originally intended, but Charlie Plessums called him a chicken, so he had to show off! During lunch, Charlie
went home, sliced a thinner piece on his bandsaw and brough it back - David autographed it!
Someone asked him about Timberwolf blades. David had heard good things, but only used one in his demo the day before in Houston. He was impressed and thought he would consider getting some for his shop.
|
|
|
 |
|
|
|
|
|
|
For gluing normal joints, David uses yellow glue, but when he says he's using a slow-setting, plastic resin glue he's talking about URAC. It's a two-part product mixed from a liquid and a powder catalyst.
He likes it due to its 1 hour setup time (excellent for complicated glue-ups) and it's also virtually waterproof and very strong.
|
|
|
|
Finishing was a very popular and wide-ranging topic for the day.
His standard finish is a two-ingredient system: Arm-R-Seal (red can with linseed and tung oil) and Seal-A-Cell (green can with tung oill and urethane). He can't name it on the air due to DIY channel rules. He made the very important point to use only gloss finish for undercoats! This prevents clouding the finish that would occur if you used satin or flat finish for the undercoats. Then use your surface finish of choice. Always use 0000 (4-ought) steel wool or Scotch-Brite pads between coats. David likes an oil-less steel wool from the Liberon company.
|
|
|
|
He spoke about "The Tree" that he mentions on his wood tour episode.
The story goes that a mahogany tree in Belize was spotted in 1965 durnig a logging operation - the loggers could tell that there was potential for a very interesting grain in the wood due to the appearance of the bark. They cut down the tree, but it fell backwards into a ravine and they couldn't get it out. The legend of the tree spread for years, until 20 years later when a crew went in to get it. They found it and cut it into sections. The sections were dragged through the jungle by bulldozer for 70 miles to a river. They were then floated down the river to a sawmill. In 1985 David had the opportunity to buy several pieces for $15 / board-foot. He took some but not all of it and kicks himself now as it is so rare that when found can cost $125 / board-foot! This style wood is called "quilted mahogany" and extremely rare. David used it on his Mahogany Headboard episode.
|
|
|
|
David then moved into patinas.
You have seen him do two chemical patinas on his shows. This uses long-term chemical reactions of acids on metal to create an etched pattern. The chemicals are toxic so you have to exercise caution. Cold patina allows the reaction to occur at its own pace while hot patina uses a torch to speed up the reaction time. When the reaction is where you want it, rinse carefully to arrest it, then carefully dry the surface. He then applies a microcrystalline wax to seal and protect the metal. The formulas for his mixtures are on the DIY web site. David gets his chemicals from Bryant Laboratories.
He recommends Ron Young's book Contemporary Patination.
Unfortunately Amazon.com shows this as out of print so you'll have to hunt around for it.
|
|
|
|
|
|
Another style of patina uses paint. He will show this technique on some upcoming shows! The process is multi-step:
- Apply a white pigmented primer shellac to the wood in question. This seals the wood and creates a smooth surface for the remaining steps.
- Lay down background colors using Japan paints.
These are oil-based, and you can apply them in layers and then fully or partially sand through for different looks. You can use cheesecloth or plastic mesh to create pattens.
- Apply metal leaf using sizing.
You can gild on any paintable surface. When the sizing is tacky, carefully apply the metal leaf. David has used copper, gold and Dutch metal. When dry, remove any excess with a stiff brush at a 45 degree angle.
- You can apply chemicals to alter the look - this oxidizes the metal. Applying pieces of tissue paper will cause the chemicals to "creep".
- Apply sanding sealer to completely seal what you've laid down so far.
- Apply a top coat of nitrocellulose lacquer. This can be sprayed on and David recommends 15 - 20 coats. You can't use water-based or it will soak through and ruin the underlying design.
David has an old siphon-style sprayer but would go with HPLV if he had to buy a new unit.
|
|
|
|
|
|
|
|
A few random items:
- David uses a Forrest WoodWorker II blade in his tablesaw as it is an excellent general purpose blade. He uses the Forrest factory sharpening service.
- David's "aircraft carrier" jointer is a 15" 'American' brand from the 1930s. He paid $1700 for it. He has a friend with a 36" jointer!!
- For those hobby woodworkers dreaming of dumping the 9-5 job and making a living at woodworking, David has some sobering news. At one point in his career, David's wife was concerned about his ability to
support his family, so David took a job as a dental technician.
He mounted teeth to dentures, learning to use small pins and glue to get strong chemical and mechanical bonds. Anyone watching his shows can see that this experience has spilled over into his woodworking technique.
|
|
|
OK, now the news you've been waiting for - DIY has 26 new episodes ready for airing!!!!!! They should start in March or April 2004, but I haven't seen any notice of this on the DIY web site.
Among some of the topics for upcoming shows are 3 episodes on wood turning and several double-episode projects. He has also done a show on "Masters of Woodworking" including guest appearances by James Krenov and Art Carpenter. The bad news is there are no plans for shows beyond those already filmed, so if you want more of David's work on TV, we must let DIY know that there is a serious demand for more.
When asked about some behind-the-scenes info on the show, David said each episode is scheduled for 2 normal days of shooting in his shop (it really is his personal shop, not a set). He has never finished an
episode in the allotted time, normally working until midnight on the first day and into the wee hours on the second day. He has to negotiate with the producers on what scenes to show - they're worried about
every second of airtime and David has to help them focus on what is important to show, not just for good TV but also to show steps and techniques critical to the success of the woodworker replicating his projects or
learning new techniques.
A factor we were all surprised about is David's financial relationship with DIY.
It turns out that David was paid a flat rate for each show, and that's it. He doesn't receive any royalties or residuals on first-run shows or reruns and DIY doesn't sell videotapes or DVDs of episodes, so there's no revenue to David for that either. After 5 seasons and two more in the can, I would expect the host of a successful show to be treated better than that!
Please send any thoughts you have about David or WoodWorks to comments@diynet.com
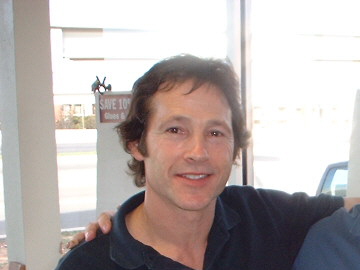
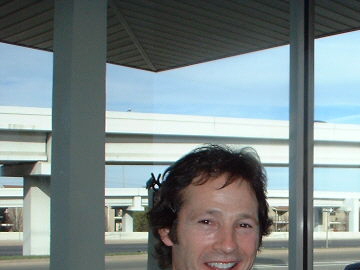
At the end of the day, David signed autographs and chatted with the crowd.
He was genuinely interested in each person, their skills and projects. He signed everything from tools, to chunks of wood and Woodcraft flyers. When I asked him to sign the DVD I made of his episodes, he said he was impressed as he's very computer illiterate. He can send email but has to get his wife to handle any attachments. To finish up this page, I include the pictures of David and I, Dave and fellow IBMer and woodworker Mark Giles and a scan of my DVD he signed.
|
|
|
 |
|
 |
|
|
 |
|
|