|
|||||||||||||||||||||||


 |
|||||
|
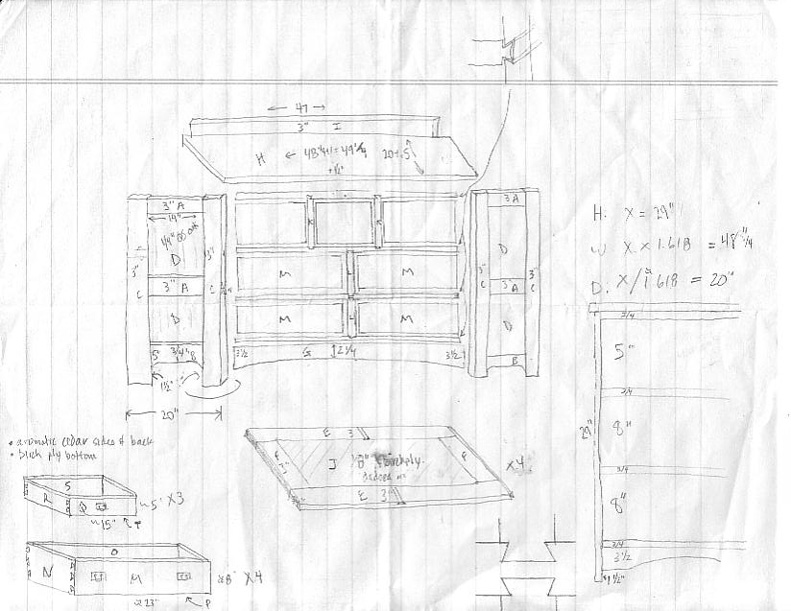
My next project is a Mission-style quarter-sawn oak dresser - similar to this design but with a much darker stain. I've been thinking about this project for a while and finally decided to go ahead. I spent a long time on the design, going through all of my woodworking magazines and books, searching web sites, visiting local stores and asking for design advice from the guys in my woodworking club... then I threw it all out and just drew a sketch with my eyes closed. Just kidding! Here is the design - no 3D CAD involved, but enough to validate the design and get me started. |
|||||
 |
|||||
|
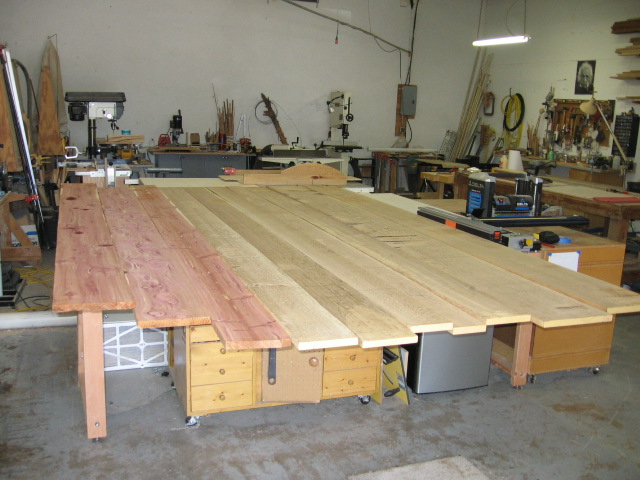
You can see the classic Mission style, 3-over-2-over-2-drawers, the horizontal and vertical drawer dividers joined with full-depth sliding dovetails, and the drawers are half-blind dovetailed. The drawer sides and backs will be made from aromatic cedar. The real kicker will be the quartersawn oak... I spent over an hour in the stacks of lumber at Fine Lumber and got some planks with really great figure. The picture on the left is $495 worth of cedar and oak... oof that hurt but the quality is fantastic. Now you know why high-quality furniture is so expensive! Of course now that I've started building, I need one more oak plank... have to wait until next Thursday when Fine Lumber is open until 6:30... The picture on the right is a piece of oak I ran through the planer - wow look at those medullary rays! If you google "medullary rays", ignore the ones referencing your urinary tract... |
|||||
 |
 |
||||
|
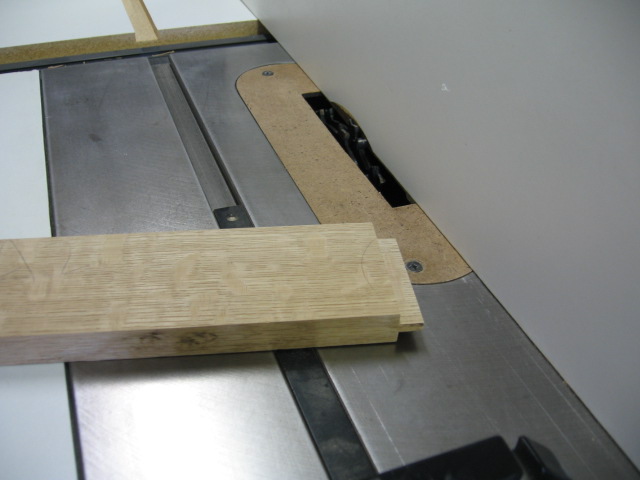
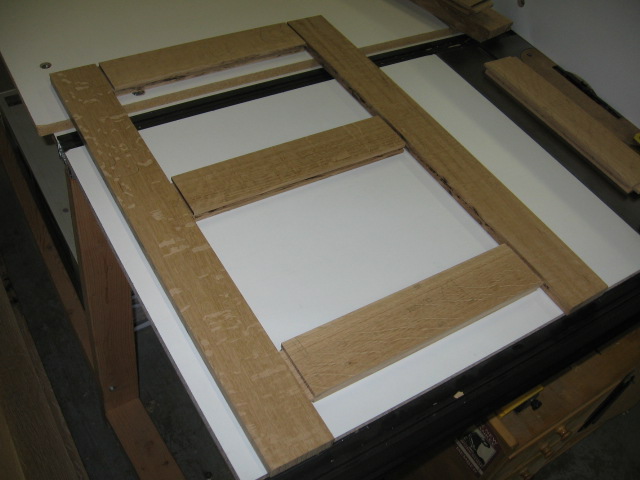
I started out by cutting the rails and stiles of the side assemblies. The sides are essentially standard mortise and tenon construction with two floating 1/4" solid quartersawn oak panels. The picture on the left shows making the tenon with my dado blade on the table saw. I was surprised how easy it was to make, but I've seen Norm do it at least a hundred times so I could probably do it in my sleep... The picture on the right shows a dry fit of the pieces. I still have to mortise out an additional 1/4" into the stiles, but I have a 1/4" mortising bit so that should be straightforward. |
|||||
 |
 |
||||
|
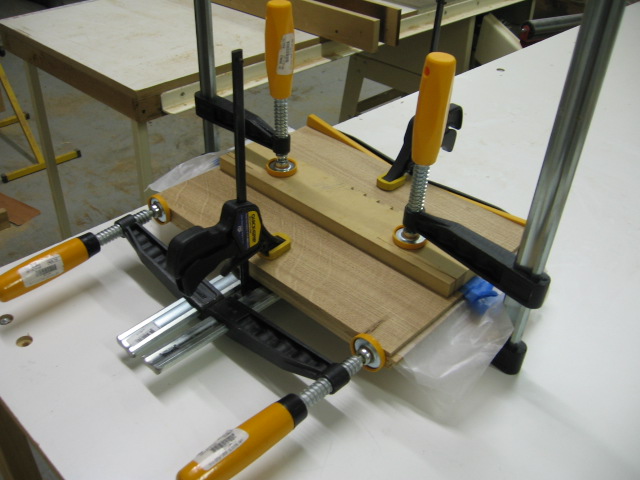
Next I resawed some pieces and planed them down to 1/4". I then planed and edge-glued each resawn pair in a bookmatch pattern. The picture on the left is the stack of four panels clamped up. Next I moved to building the four horizontal drawer separators / dust panels. These are constructed the same way as the side panels. I decided to try space balls which are supposed to stabilize and center floating panels as the panel changes size due to moisture in the air. The balls themselves are firm rubber, 1/4" diameter and the manufacturer recommends you put two on each panel edge. |
|||||
 |
 |
||||
|
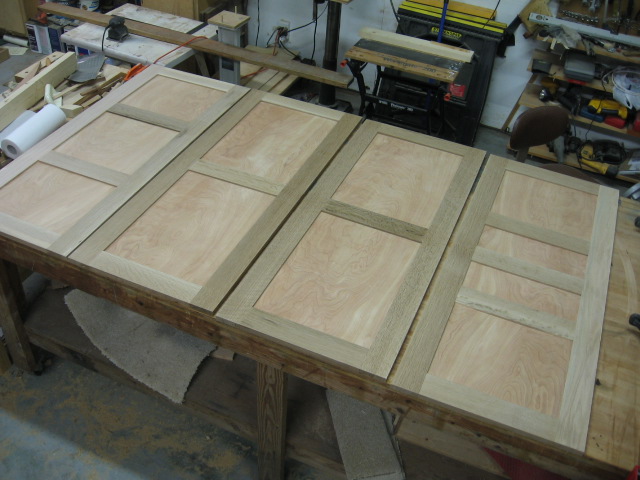
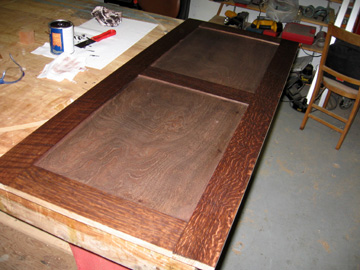
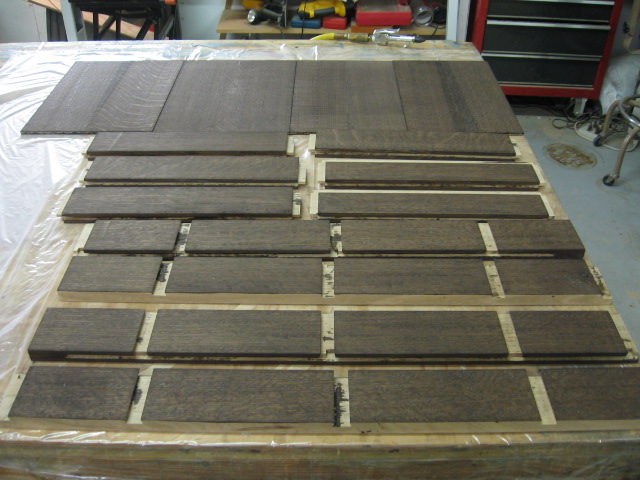
The four panels are assembled with 5mm thick floating oak plywood panels, glued and sanded, waiting for finishing before having the side panels and vertical dividers added. I think it will be better to put on the stain and finish at this stage because it will be too hard to reach inside once the main cabinet is assembled. [Update: it did help a bit, but the joining to other pieces and sanding I had to do negated any benefit so the moral of the story is: do all staining and finishing after construction is fully complete.] You can see each panel has its own number and spacing of vertical divider supports to match the drawer layout that will be above and below each panel. I found a great article on Mission-style finishing in a FineWoodworking special edition magazine titled "Finishing and Refinishing Furniture". The author recommends applying a TransTint dye called Dark Mission Brown followed by a Bartley gel stain called Jet Mahogany. I was a little worried that the dye stain was too dark but after it dried it lightened up a bit and even more with a rub with a gray (000 steel wool equivalent) synthetic pad to knock down the grain raised by the water mixed with the dye. |
|||||
 |
 |
||||
|
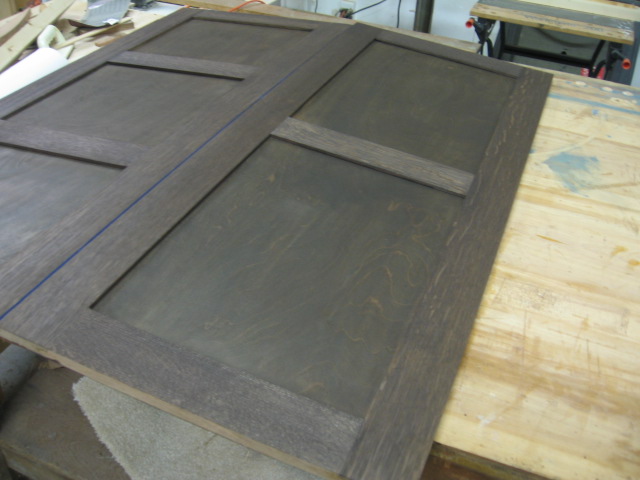
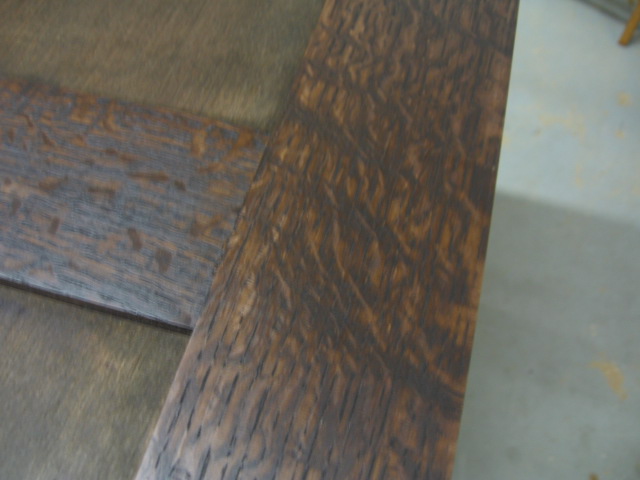
The key to the gel stain is it gets trapped by the normal grain but not in the medullary rays so it makes them "jump" out with the greater contrast. It also dries *very* quickly and buffs up nicely, getting very close to the look I wanted. It will only look better with a coat of lacquer. Sorry for the crappy lighting - it definitely looks better, more like the bright spot in the left-hand picture. |
|||||
 |
 |
||||
|
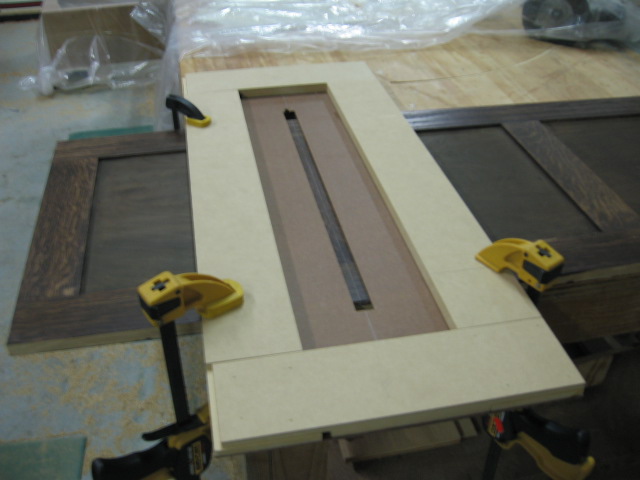
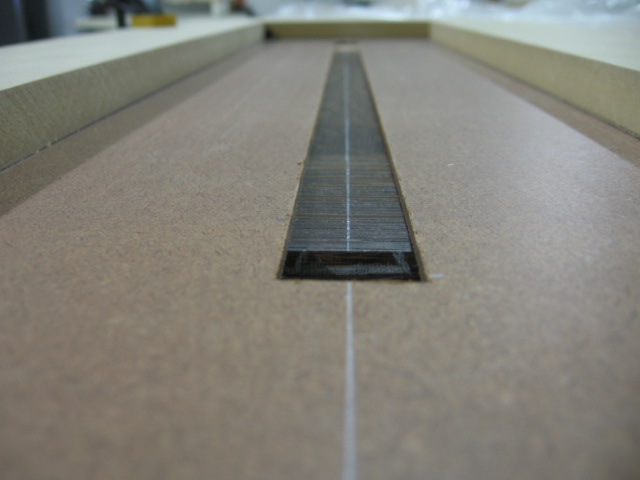
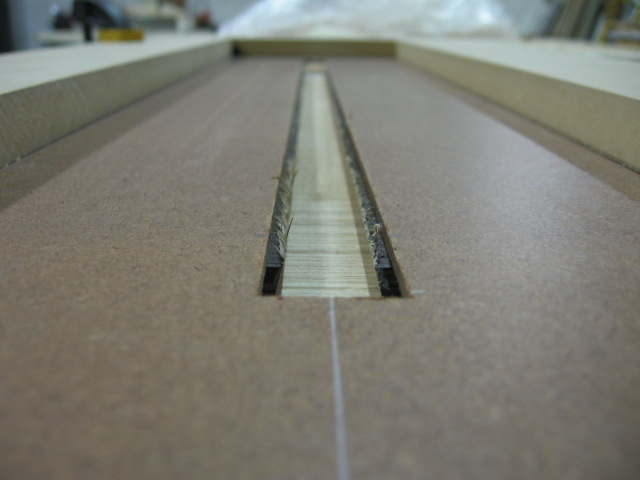
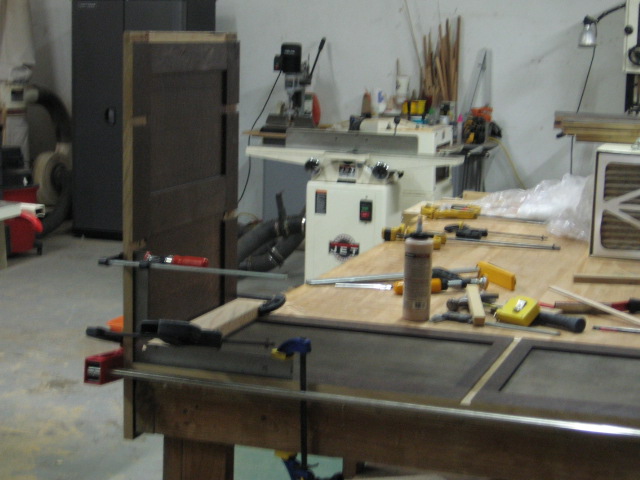
At this point, I had to make the leap and do the sliding dovetail joints - each vertical drawer separator has a 20" full-depth dovetail into the dust shelf above and below - see the example on the bottom edge of the design sketch. I chucked up a dovetail bit in my router and with a lot of careful measuring and a clamp guide, I made two passes for each dovetail slot, to account for the 3/4" width of the vertical piece. As I was getting started, a little voice was whispering "Build a jig... build a jig" but since I only had to make 8 slots, I figured I could handle it. Well despite my careful measuring, after doing 2 slots, they were clearly not going to have the repeatable precision I wanted... so I built a jig. The jig clamps over the slot location and the MDF around the edge holds the router to only where it should remove material. Machining the slots became fast, easy and accurate. Next time I'm going to listen to the little voice... And it actually fits! Well, after tremendous sanding, chiseling and swearing. Hint: Full-depth sliding dovetails are a pain in the ass. |
|||||
 |
 |
||||
 |
 |
||||
|
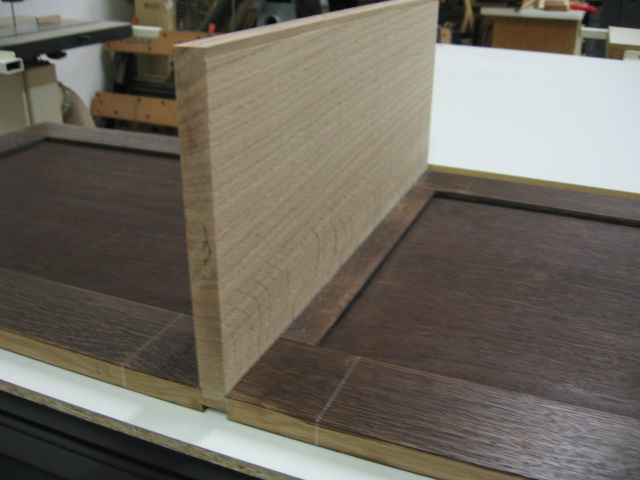
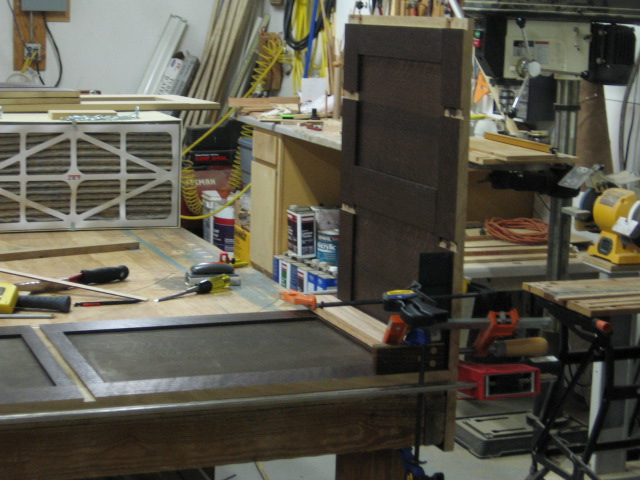
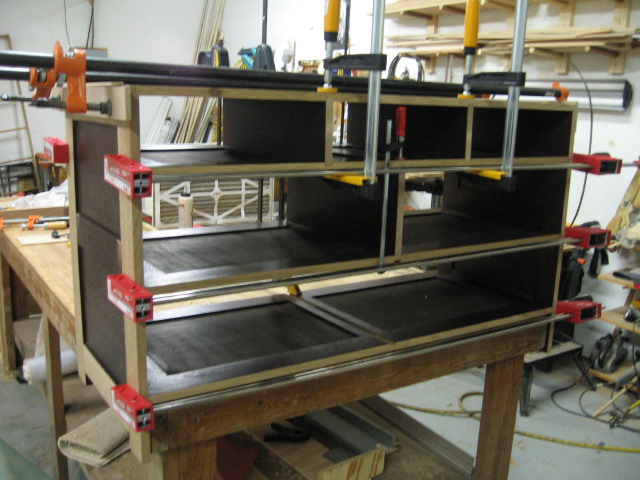
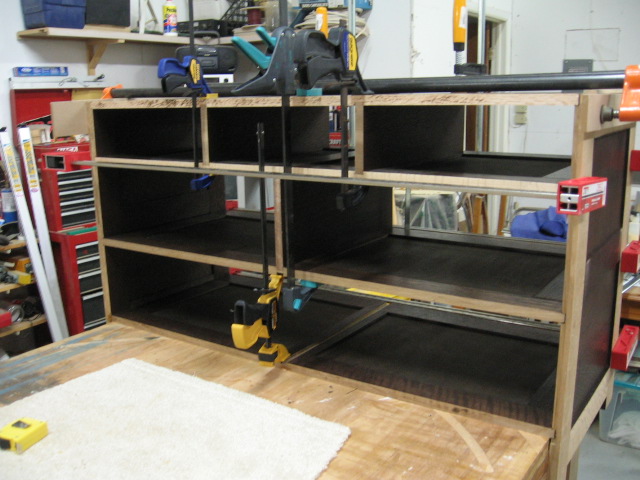
Next I moved on to the dye / gel stain of the pieces making up the side panels and assembled them. I milled the sliding dovetails to accept the ends of the dust panels, with a half dovetail at the top to accept the top dust panel. Then I glued the bottom panel into the sides, then slid in the two middle panels, then the top panel. Finally I slid the vertical drawer dividers into place, except the bottom one which developed a little cupping so I had to have a stern talk with it. |
|||||
 |
 |
||||
 |
 |
||||
 |
 |
||||
|
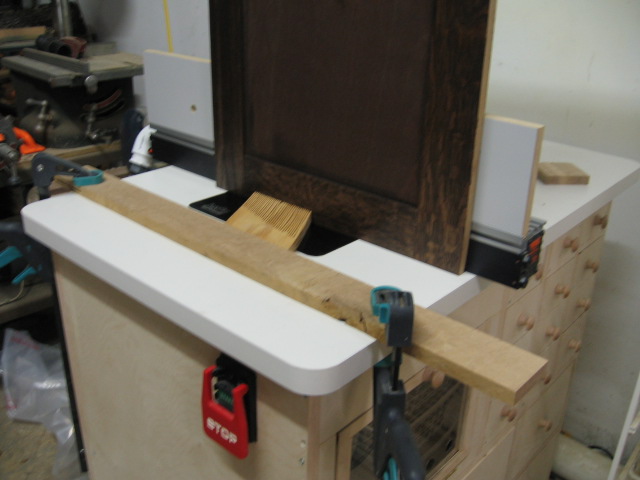
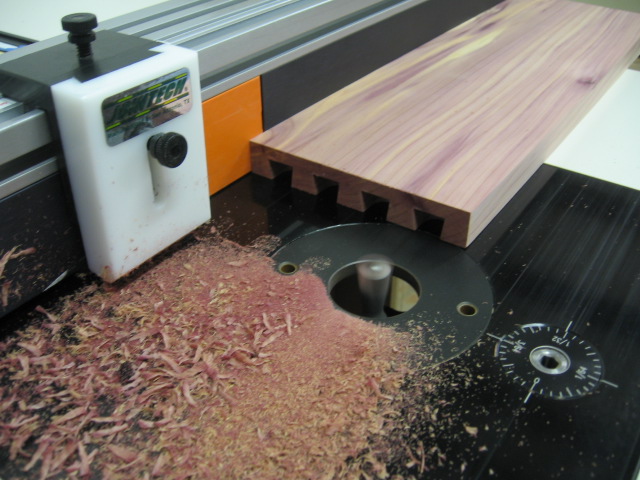
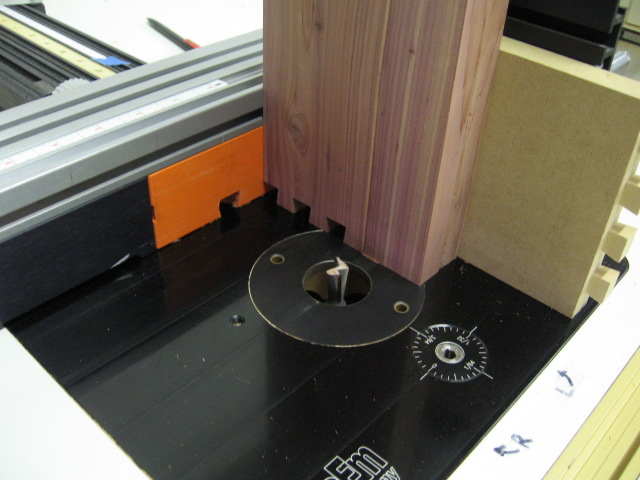
Here I am working on making the drawer half-blind dovetails. The fronts of the drawers are a cut from a continuous piece of oak and the sides and back are aromatic cedar. I make the dovetails with my Jointech system. |
|||||
 |
 |
||||
|
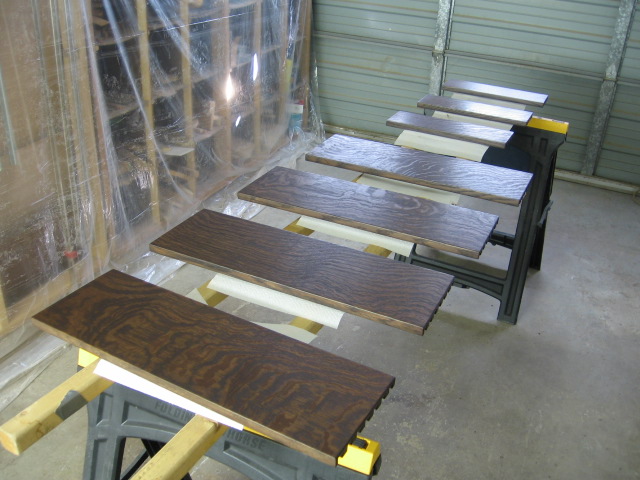
Well after a significant amount of time away from the shop due to business and Christmas travel, I started working on getting the drawers finished and assembled. The challenge was to dye (first picture) and gel stain (second picture) the drawer fronts the same as the rest of the cabinet, while leaving the sides and back unfinished cedar to preserve the aroma. During final assembly I'll put wax on the outside of the drawers to make it easier to slide in and out. I came up with an effective but tedious way to mask off the joint where front meets side, as shown below. When I glued them up, I deliberately left the sides about 2mm above being flush with the side of the drawer front. This left me a little bit of cedar to work with to sand down almost level without sanding through the gel and dye. In the case where I did sand a wee bit too far, I used a fine paint brush to touch up with dye. |
|||||
 |
 |
||||
 |
 |
||||
|
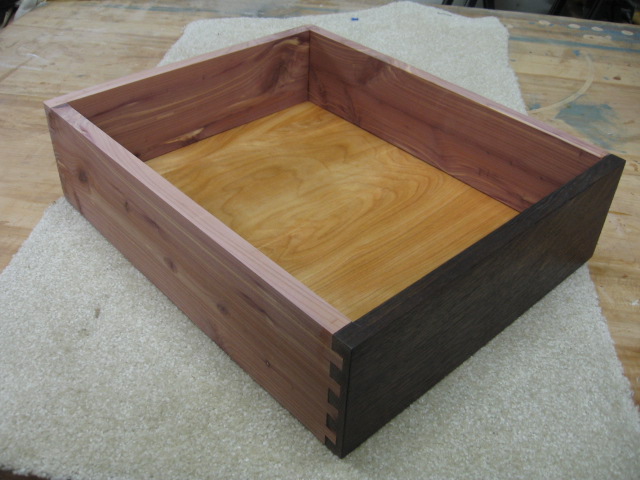
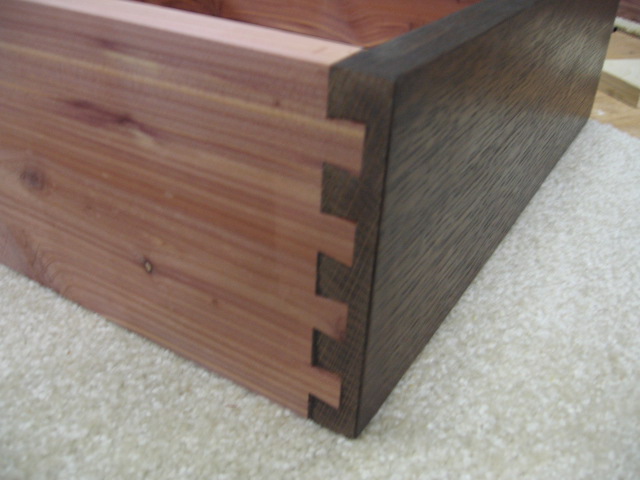
So here's a closeup of the final joint and all of the drawers successfully fitted in the cabinet. Don't ask me how many hours of tweaking it took to get the drawers to fit nicely, and that's even after I let the glue set up with the drawers in the cabinet! Note I was able to preserve the grain across each drawer row by making sure I built each drawer with the proper front. |
|||||
 |
 |
||||
|
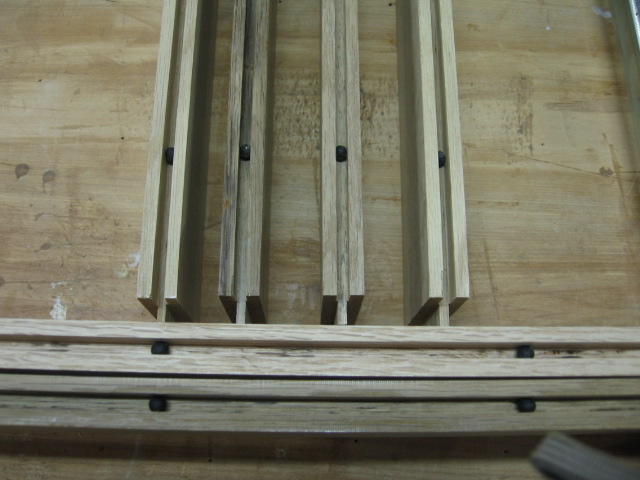
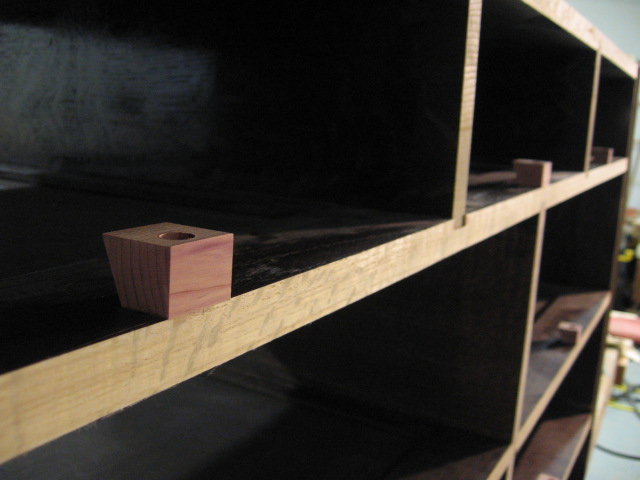
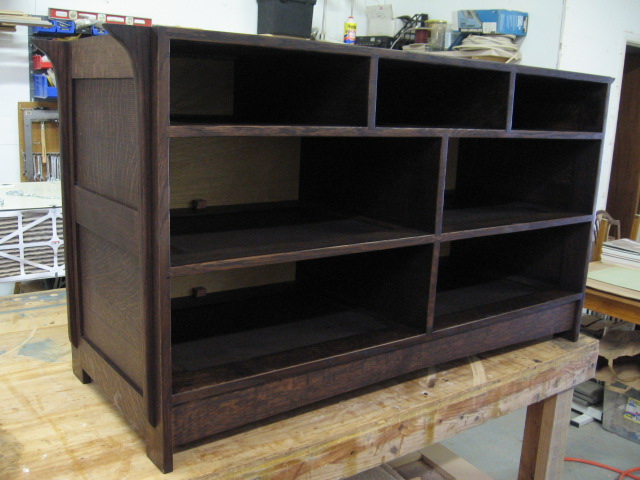
I installed the cedar drawer stops as you can see below. I don't know if I've seen this technique before, but I need to adjust each drawer to its proper depth and thought if I added a stop block with an angle it would be easier to adjust than if the block had a flat face. I then added the decorative side brackets (don't know what the proper name is), arched toe kick, rear panel, sanded everything, applied the dye and then the gel stain. The frame is now complete. |
|||||
 |
 |
||||
|
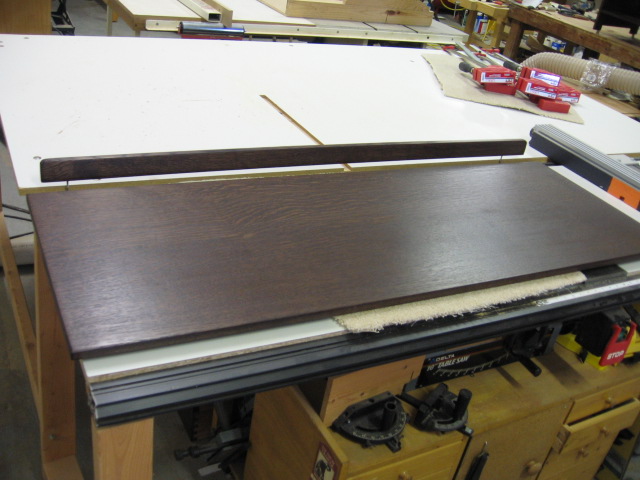
I constructed the top from two beautiful pieces of 12" wide quarter sawn oak. I followed the same dye and gel stain process, then created and attached a small rail across the back. Everything is done now, just waiting on the lacquer spray! Oh, also have to choose the drawer pull hardware. |
|||||
 |
|||||