|
|||||||||||||||||||||||


 |
||||
|
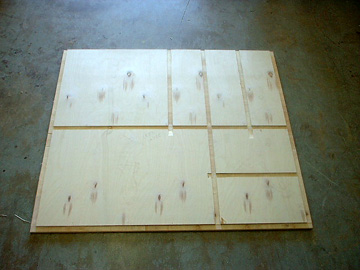
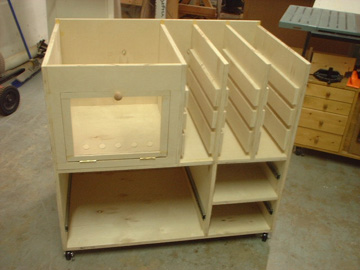
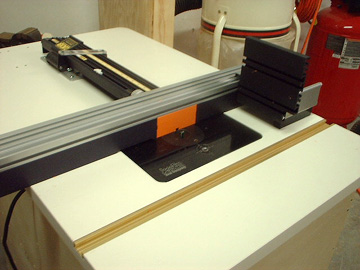
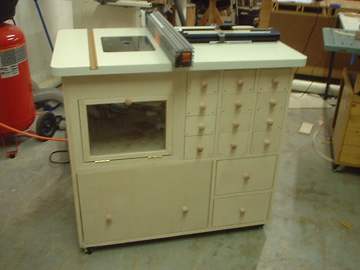
I have lived with a router mounted in the right wing of my tablesaw for years. I wasn't happy with the flex of the plate, the unevenness of the surface and the inaccuracy of my home-built fence. I finally got the urge to build a dedicated router table so I did some research on the important bits and pieces and completed it over the course of two weekends. It starts with this router table top from Woodpeckers. Wayne Kovsky, the organizer of the Colorado Software Summit, gave me an extra top he had. Thanks Wayne! The heart is this 3 1/4 horsepower beast of a router from Porter Cable. This thing will be able to handle any bit I can fit ito it. The bit height is precisely controlled by the Mast-R-Lift by JessEm. It's beautifully engineered and each quarter-turn of the crank raises or lowers the bit 1/64th of an inch. The last component of the table is this cabinetmaker fence from Jointech. The unique part of this fence is the clicher fence machine that uses templates to make many different types of joints. It can do equally- and variably-spaced through dovetails, half-blind dovetails, box joints and "double" of each of these joints. There are over 60 templates provided with the fence. Ok, so on to the table. I made it from 3 sheets of cheap birch plywood from Home Depot. I patterend the design after Norm's deluxe router table, but I had to turn it sideways due to the orientation of the fence mechanism. All of the pieces are dadoed, glued and screwed. On the left are the raw pieces cut to size and on the right the back piece, with all of the dado slots. |
||||
 |
 |
|||
|
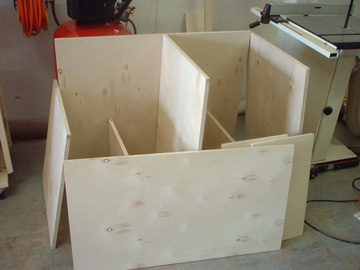
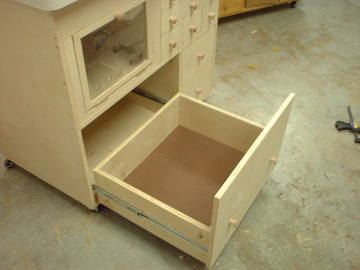
On the left is the dry fit of the back, sides and dividers. The glunig and screwing ensues. You can see the drawer slides, the hinged plexi door for access to the router and the full extension drawer slides. |
||||
 |
 |
|||
 |
 |
|||
|
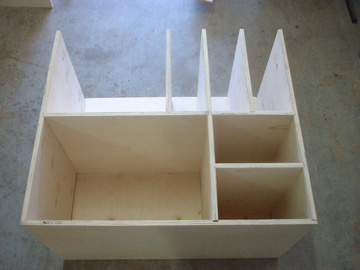
The sliding drawers, top and router fence are in place. Some of the drawers are designed to hold bits, others will be customized as the need arises. |
||||
 |
 |
|||
|
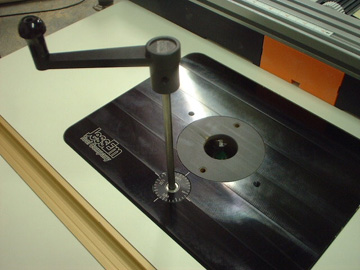
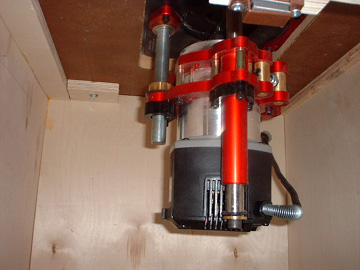
Here is the router plate with the above-the-table crank in place. It works like a dream! You can see how the router is mounted into the lift underneath. For now I have to power on and off on the router. I'm looking for a nice safety switch to mount on the outside. |
||||
 |
 |
|||
|
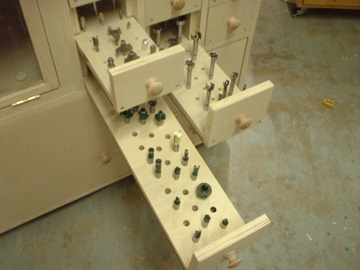
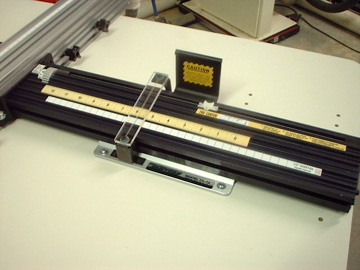
Here we see the fence, the clincher slide and the push block. The white strip is the 1/2" equal spaced dovetail template. |
||||
 |
 |
|||
|
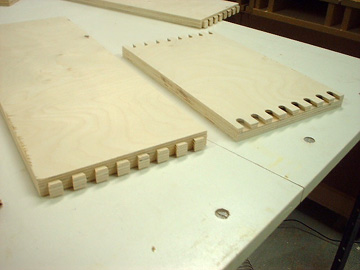
Now that everything is in place, I built the three full-extension drawers with half-blind dovetails. With this fence you can make multiple sides with the tails at once, ganged upright against the pushblock. You have to make the front and back with the pins one at a time, lying flat on the table. The first joint I made wasn't very tight - my fault for a bit-height issue... The subsequent joints came out really tight as you can see on the right. I wetted down the joint so you can see how it turned out. |
||||
 |
 |
|||
|
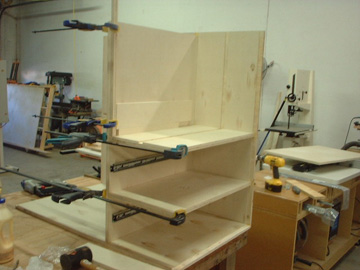
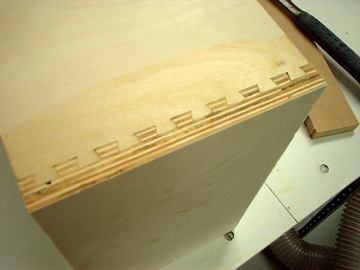
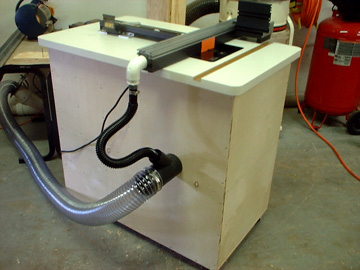
This is my first try at full-extension drawer slides and they turned out perfectly. Dust collection handles both the router compartment and the fence itself - the small hose has to be a little overlength so it will fit when the fence is fully retracted.. And at last the table is complete. |
||||
 |
 |
|||
 |
||||