|
|
 |
|
|
This is a rough pictorial timeline of my work on the classic Martin D-28 acoustic guitar replica I'm making. I'm following plans from the Stewart-MacDonald luthier supply web site and the 4-part DIY Network show on building this same guitar. I'm just dumping in full 640x480 digital pictures as I work through the project. When I finish, I'll come back and edit the pictures down to reasonable size and generally clean up. This is going to be a very long page, just keep scrolling down. Sorry about the crappy images!
|
|
|
|
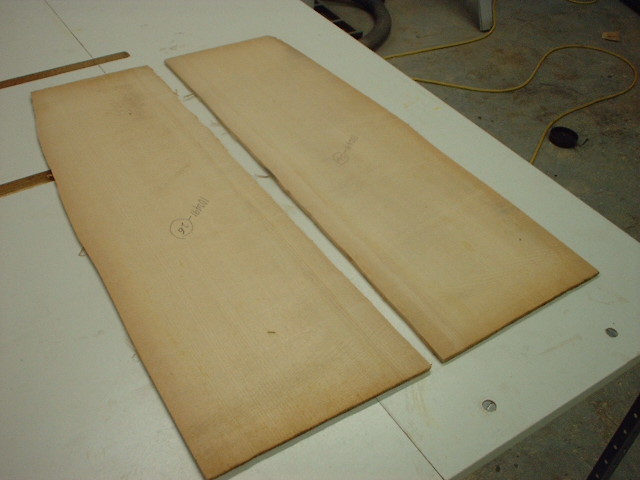
The first picture is Eastern Red Spruce, the magic wood for acoustic instruments. I bought this from John Arnold - the man in the DIY video who harvested the tree from the woods of North Carolina.
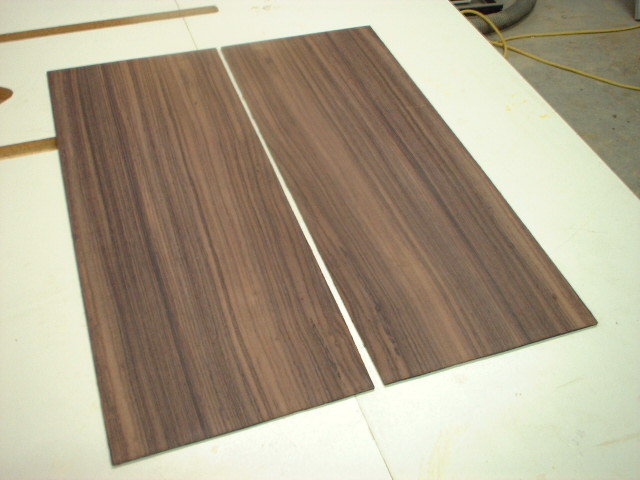
These are bookmatched slices for the very reasonable price of $75. He sells matched pieces from $50 up to $150 per set. The second picture is Indian Rosewood for the guitar back, the perfect wood to match the original D-28. I ordered it from Stew-Mac (along with about $500 in wood and parts - this is not a cheap undertaking!). You can see the striking visual effect of the bookmatched pair.
|
|
|
|
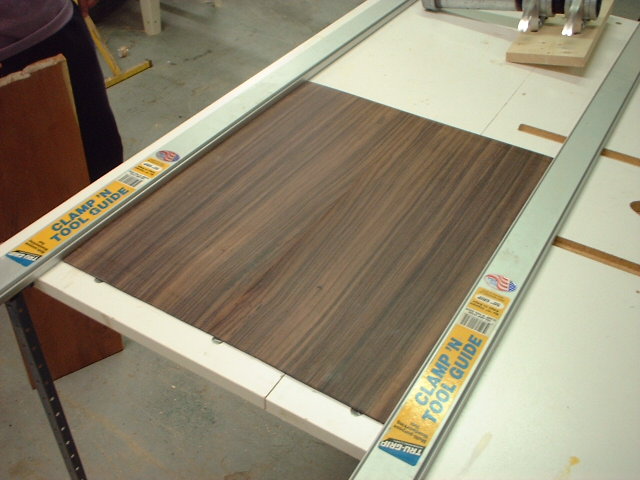
Indian Rosewood for the sides, also bookmatched.
|
|
|
|
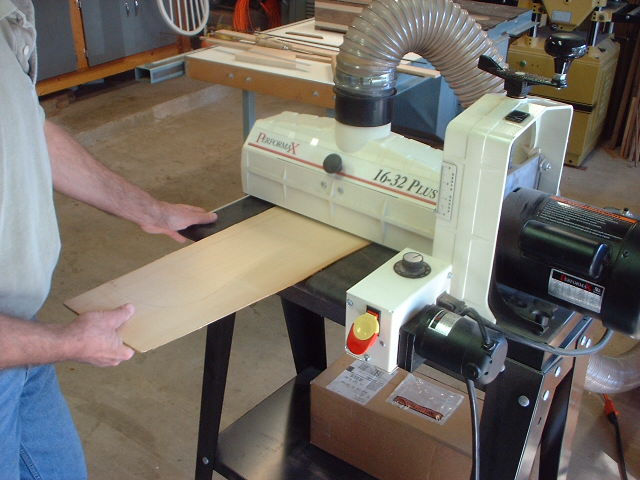
To begin construction, the top, sides and back had to be run through a drum sander to get to the proper thickness.
Skip Crockett from my woodworking club ran the pieces through on his machine because I don't have a drum sander (yet!)
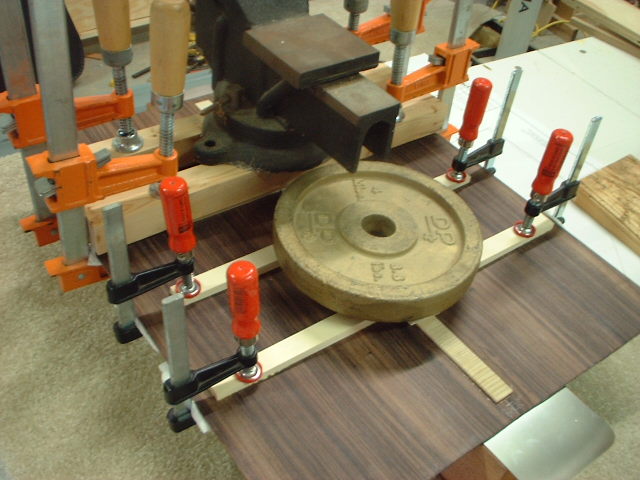
I used these two long clamps as a jig to glue and clamp the jointed edges of the back pieces together. I spaced the clamps just the right distance apart to put the right pressure on the glue joint.
|
|
|
|
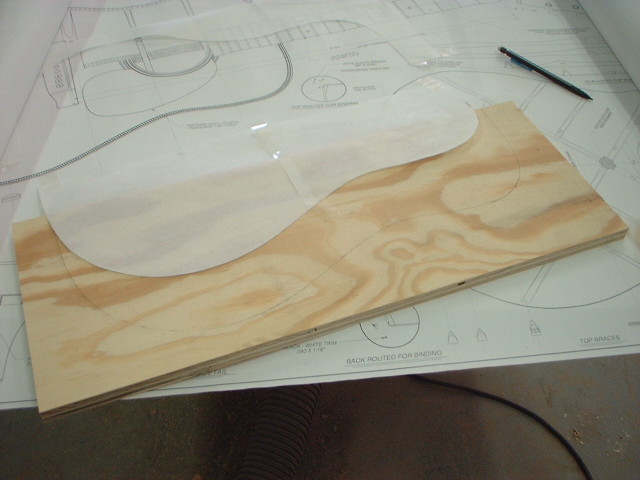
A suitable amount of weight to make sure the joint stays in line. The plastic bag prevents the walnut block from being glued to the back pieces. Using the Stew-Mac plan as a guide, I cut out a paper
template, then transferred the outline to a piece of plywood.
|
|
|
|
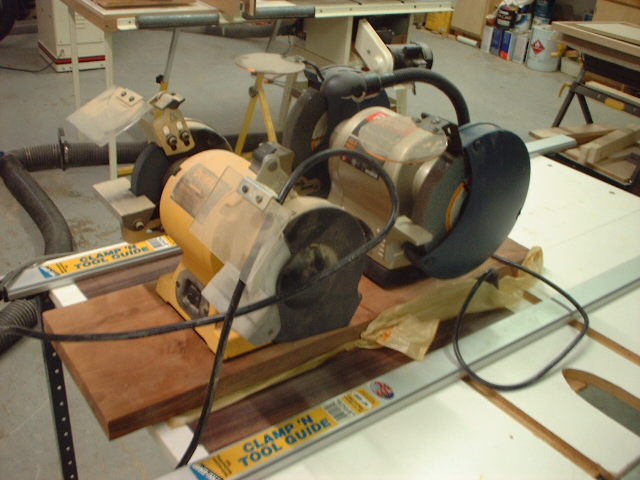
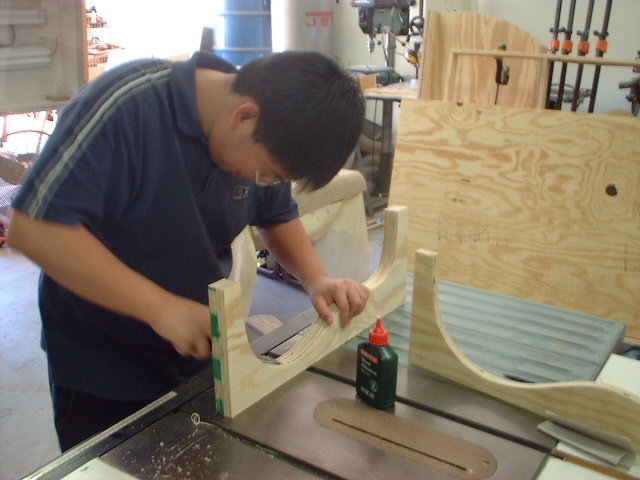
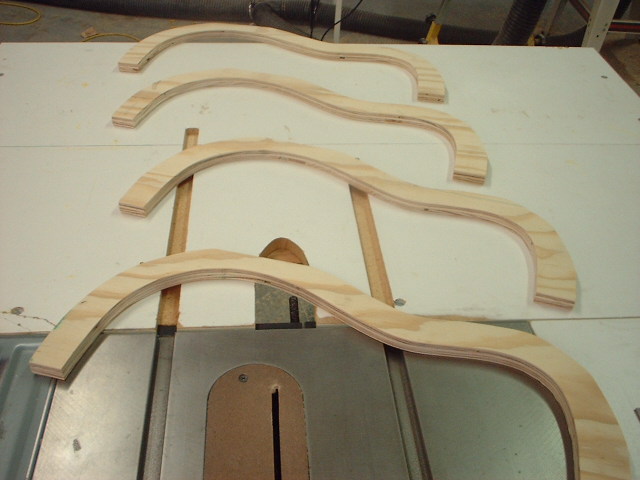
The pattern is cut out and smoothed.
This is Ben, visiting my department from IBM China for 6 months. I've got him hooked on woodworking. Using that first, perfectly shaped piece as a guide, I made 3 more using a pattern-following router bit.
|
|
|
|
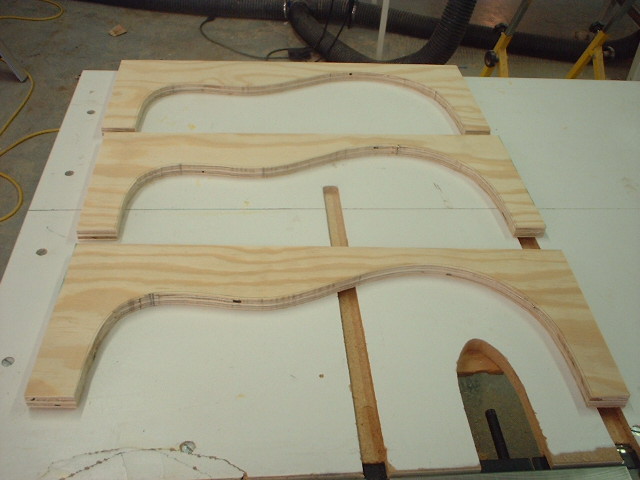
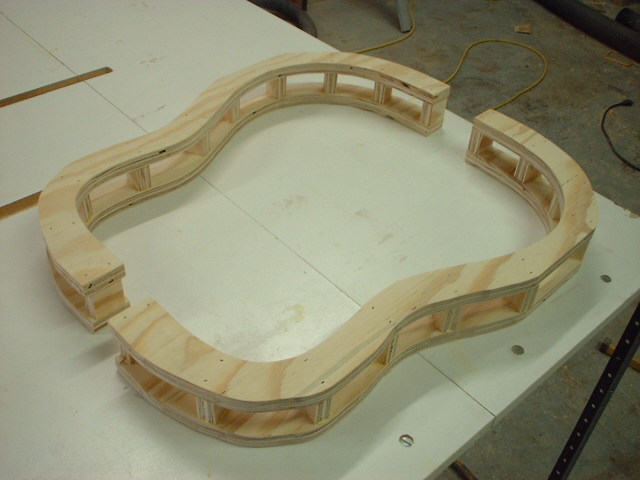
I then cut the same shape on the other edge to allow the clamps to have a 90 degree angle on the curves. Add some spacers and we have the two body side clamp jigs.
|
|
|
|
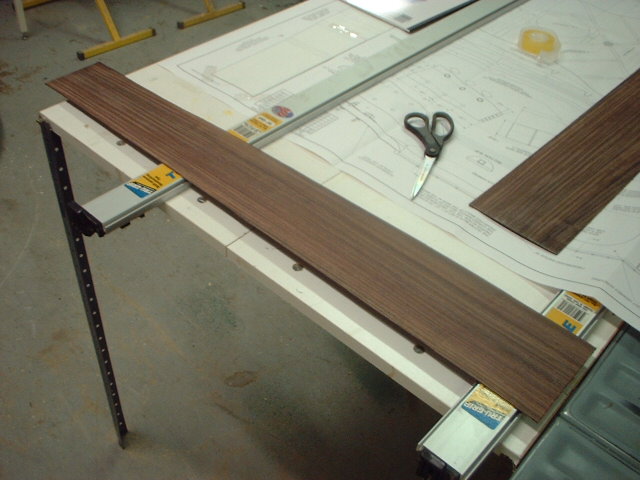
The rosewood side is cut and shaped to proper size. Note that the guitar body is thinner at the neck and gets thicker toward the end.
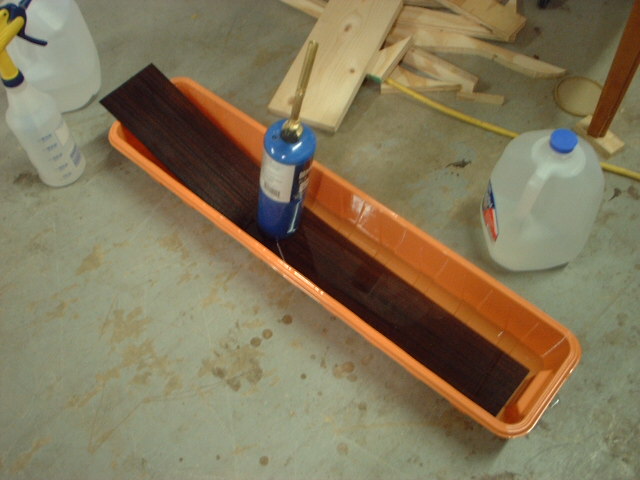
In order to bend the rosewood sides to the proper shape, I had to soak them for 30 minutes. Unfortunately this wallpaper tray is not quite long enough so I had to alternate soaking the ends.
|
|
|
|
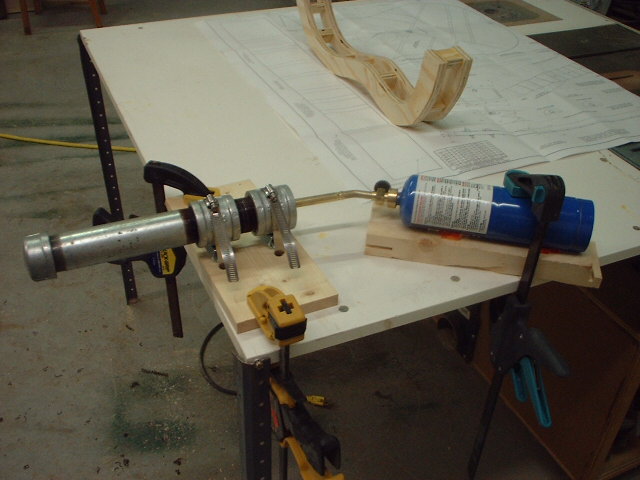
This is the bending jig I built, patterned after the one used on the DIY show.
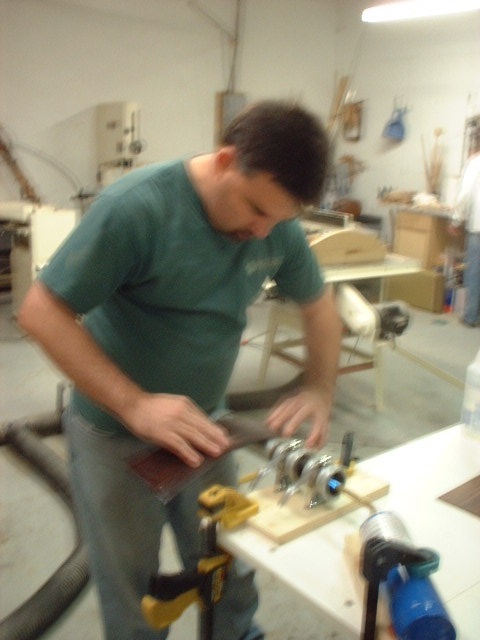
It uses steel plumbing pipe heated by a propane torch. The jig is ready for work when water sizzles on the pipe. I had to let it heat up for a long time to get even heat across the full length of the pipe. This is what bending the side on the jig looks like if you're drunk. The trick is to work very slowly and keep the wood wet at all times, using a spray bottle. If the wood dries out it will burn. The technique is to gently press down where you want the bend to occur - the wood fibers heat up and constrict, bending themselves in the direction you want.
|
|
|
|
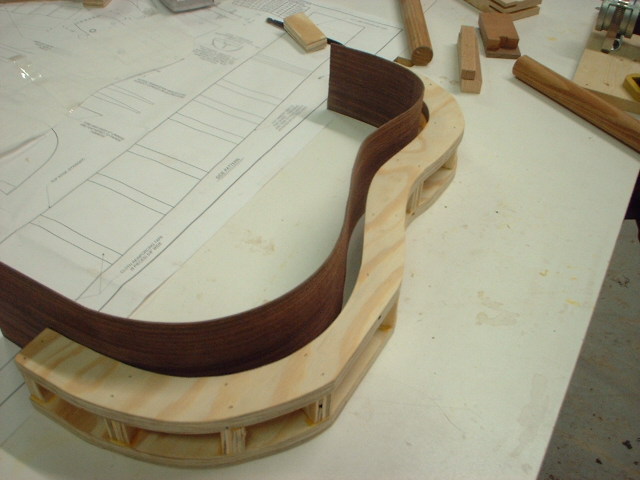
Carefully bend the side until it exactly matches the clamping jig.
It takes about an hour of bend-check-repeat to get it to the right shape. Clamp immediately to get the side to lock into shape as it cools and dries. The right side has dried in the clamps overnight and now has just a couple of clamps in place to make sure it doesn't come out of shape. The left side is just going into the clamp just after bending.
|
|
|
|
After jointing the two bookmatched top pieces, they're glued just like the back was.
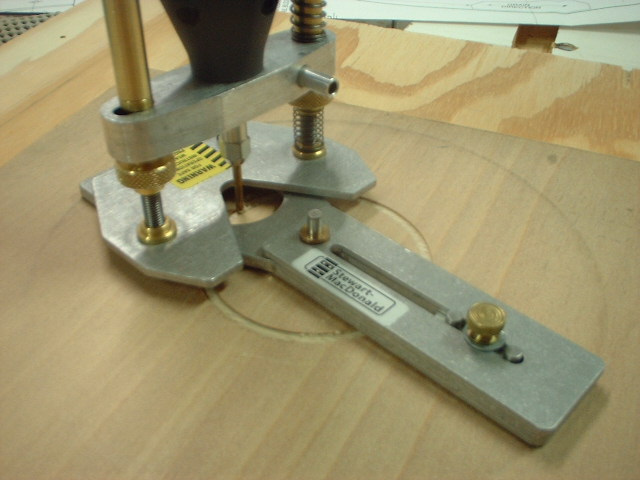
This is a really sweet jig that allows you to cut the channels for the purfling (decorative bands) around the sound hole. It's designed for a Dremel (luckily that I already had) and has very fine up/down and in/out adjustments. Here I'm practising on a scrap of thin plywood to get the depth just right and hone my technique. I found that gently cutting about an inch of the curve, then backing up to clear the channel and fine tune the edges worked best. It also allowed the bit to cool down because it is so fine that it overheated pretty fast.
|
|
|
|
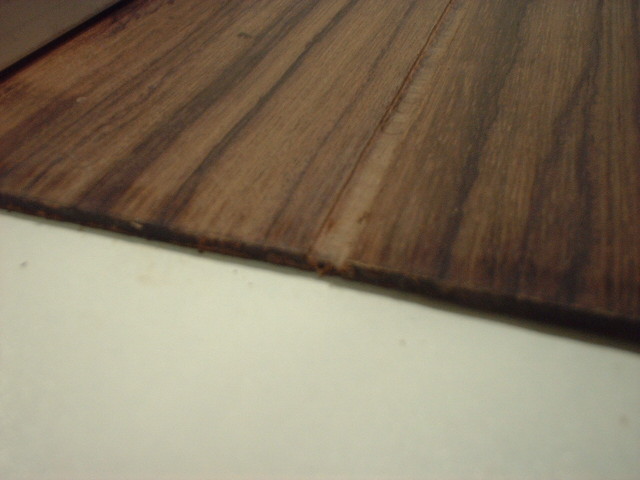
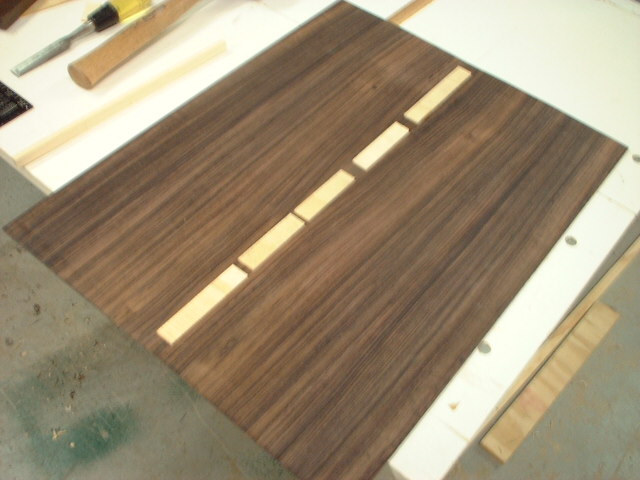
Here I have routed a slot right at the joint of the two back pieces using the dremel
screwed into the flat base but with the circle jig removed. It's exactly the right width for the inlay and is about .04" deep or about half of the total thickness of the back pices. The slot needs to be deep enough to be able to securely seat the strip, but not too deep to cut through or cause the joint to break. This is how the inlay strip looks in its slot.
|
|
|
|
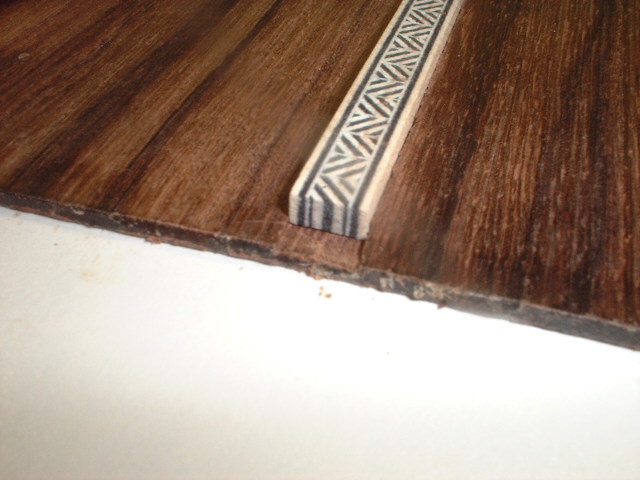
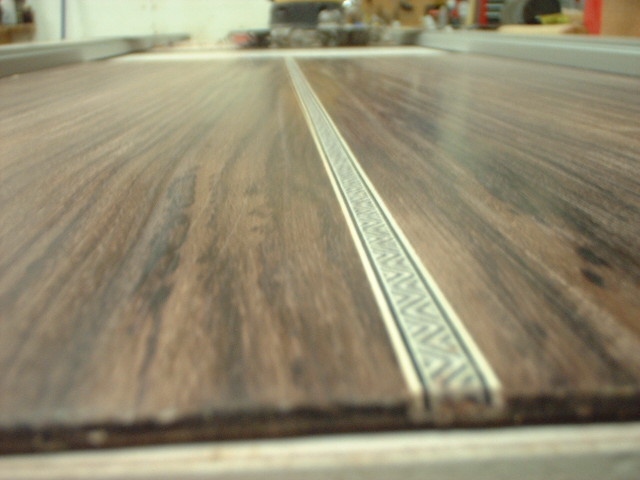
And this is the final look, after gluing and removing the excess strip height using a hand plane and cabinet scraper. Now that it's glued in, the joint is stronger than the wood around it.
|
|
|
|
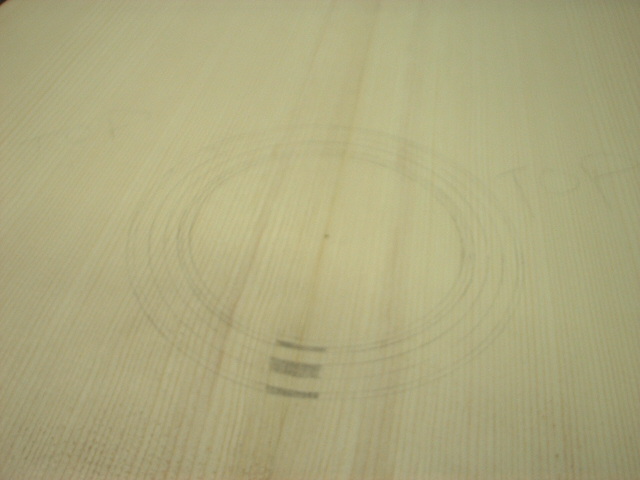
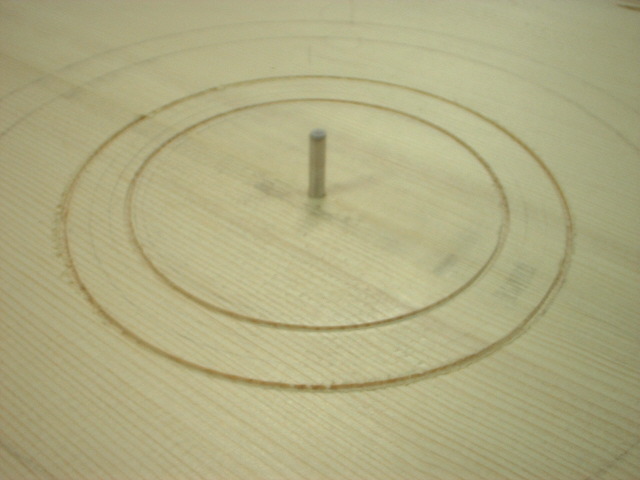
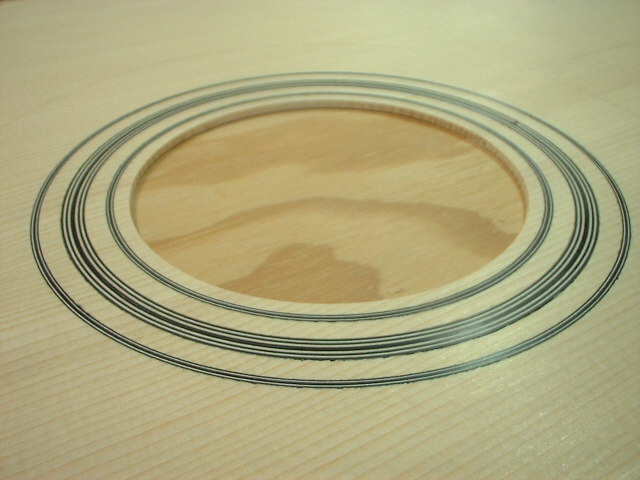
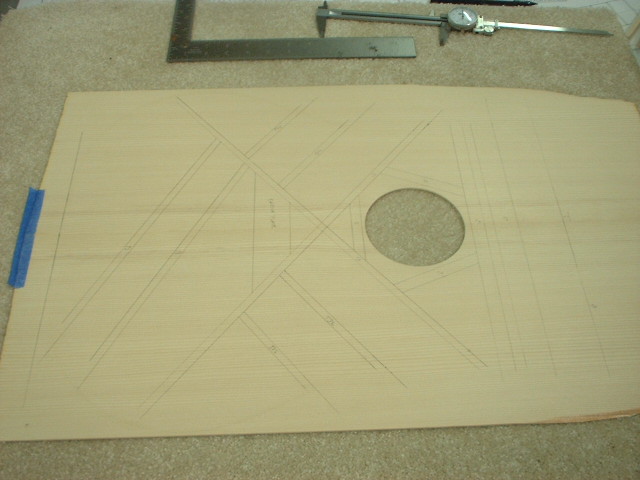
This is a layout of the design for the purfling in the top. It follows the design of the classic D-28. I laid out the design using a precision compass and colored in a section to see how it would look.
The inner and outer purfling slots have been cut, to a depth of about 0.05" and 0.08" wide. This step is a major butt-clenching operation because a lot of things can go wrong and ruin some expensive wood, but the jig makes it pretty easy to get the slots cut accurately.
|
|
|
|
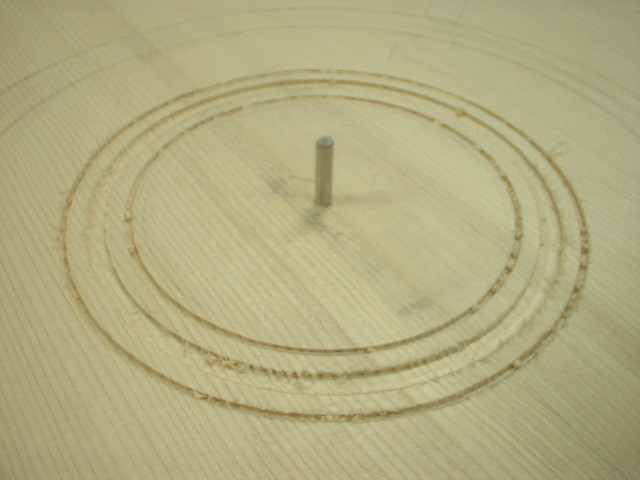
The wider center slot has been cut. There is a small amount of feathering and tearout. I tried to find a tiny Dremel router bit at Home Depot, Lowe's, Sears a hobby shop and and two craft stores and
this was the best I could get. Update: I picked up a fantastic set of tiny dremel bits during my Christmas holiday at Lee Valley in Toronto.
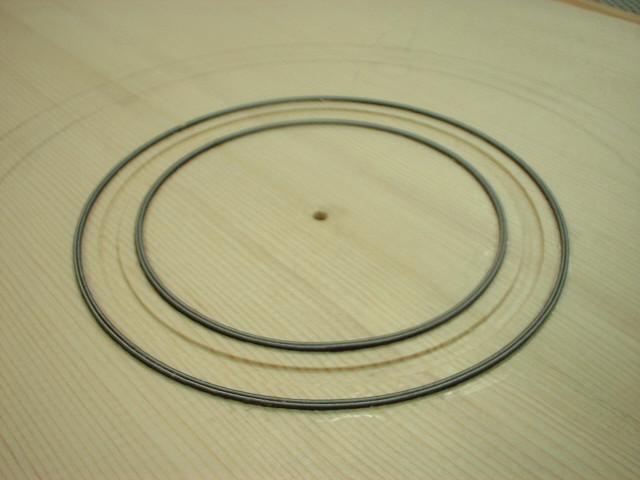
After sanding and cleaning the edges of the slots, the inner and outer purfling strips have been glued and tapped into their slots. They stick about 0.05" above the top and will be hand planed flat to match the top later. Each of these strips is made up of two smaller strips pressed together in the slot.
|
|
|
|
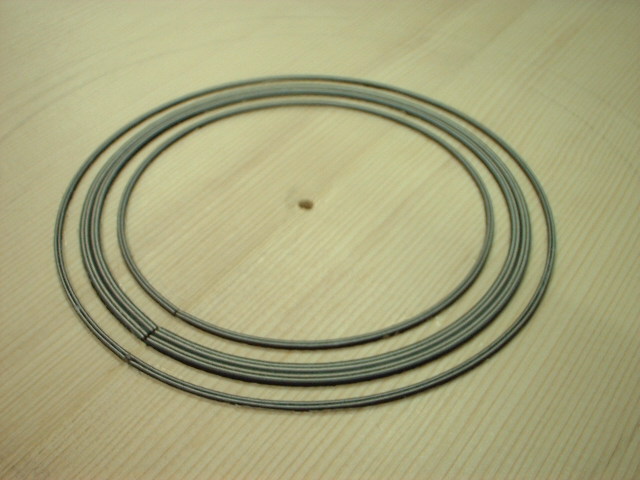
The center purfling strip has been glued and tapped into place. This strip is actually 6 small strips pressed together in the slot.
The start / end of each strip you can see on the left will be covered by the end of the fretboard. After sanding and cleaning the edges of the slots, the inner and outer purfling strips have been glued and tapped into their slots. They stick about 0.05" above the top and will be hand planed flat to match the top later. Each of these strips is made up of two smaller strips pressed together in the slot. The purfling has been hand planed and scraped down to the level of the top and the sound hole has been cut with the circle jig.
|
|
|
|
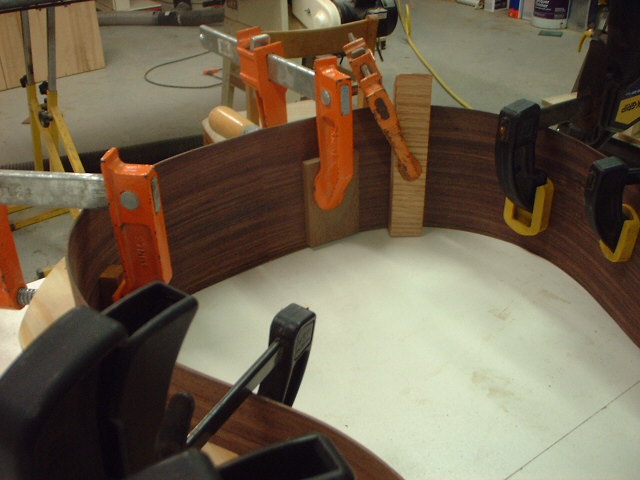
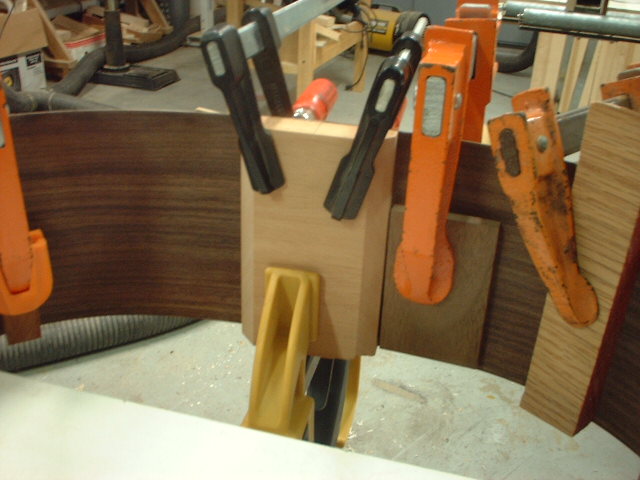
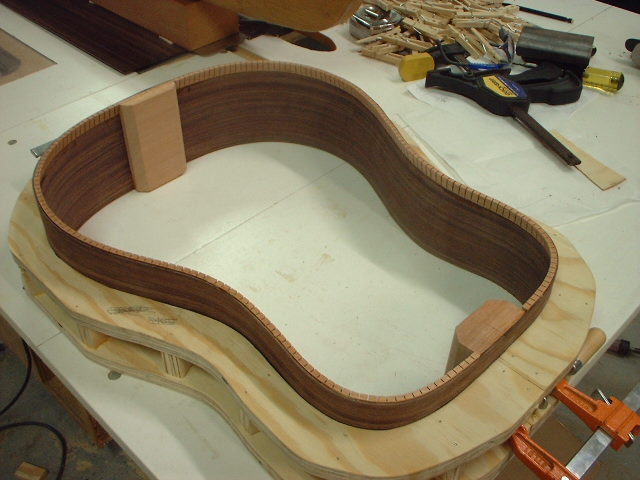
I cut the sides to the exact length so they butt up perfectly when clamped up in the body jig.
Even with a close-up like this, it's very hard to see where the two pieces meet. The mahogany tailblock is cut and glued into place across the rear side piece joint. This strengthens the joint and provides a very large gluing surface for the top and bottom at the rear of the body.
|
|
|
|
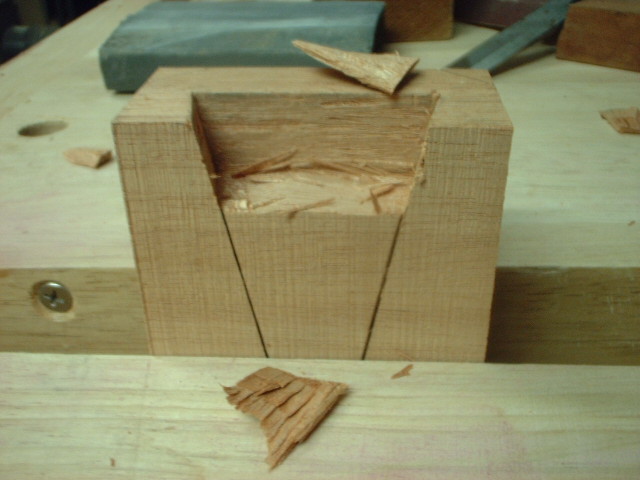
The head block performs a similar side piece joint strengthening job, but also has a dovetail cut into it to accept the matching shape on the end of the neck.
Cutting the dovetail took a while, using 3 different sized chisels.
|
|
|
|
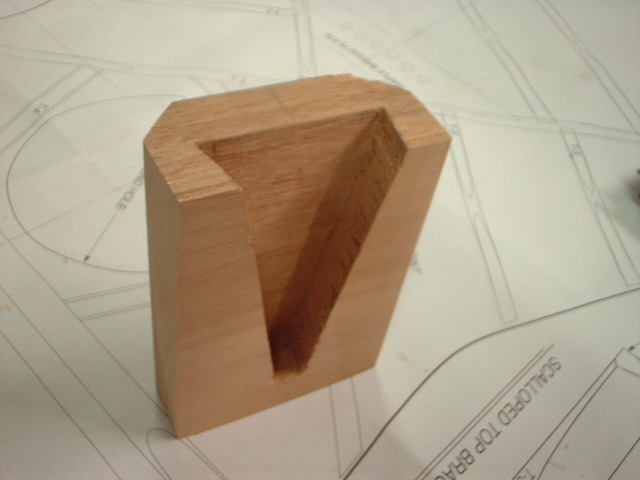
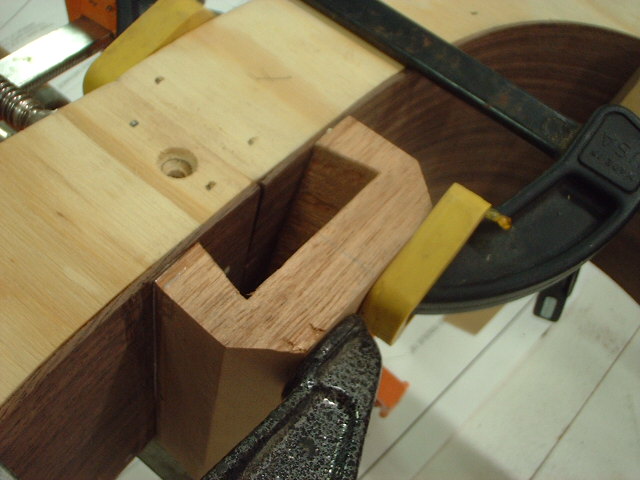
Dovetail complete. The headblock is glued in place. Later the rosewood covering the opening of the joint will be trimmed away.
|
|
|
|
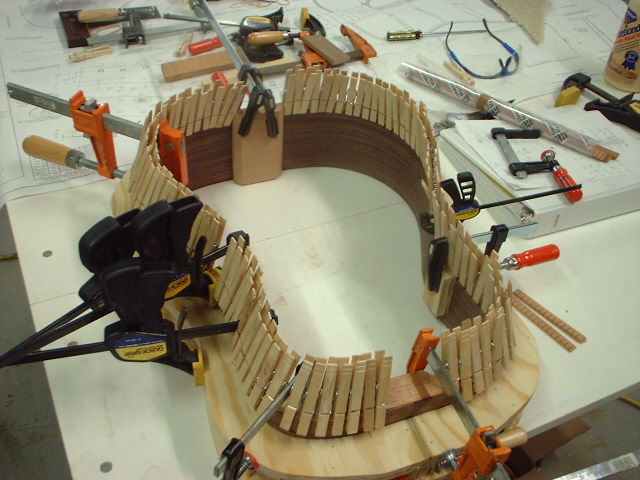
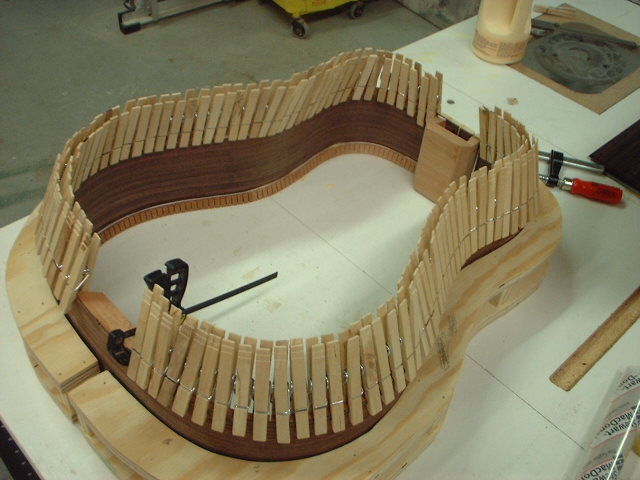
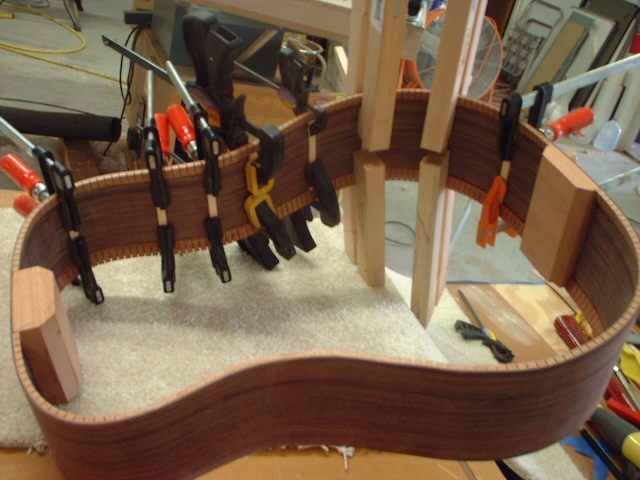
The kerfed lining that forms the support for the glue joint between the bottom and the sides is glued into place and clamped with the strength of clothepins. The kerfed lining is now dry.
You can see it's a triangular strip of mahogany with many slots (kerfs) that allows it to conform to the bends in the body.
|
|
|
|
The top gets a similar kerfed lining applied to the sides.
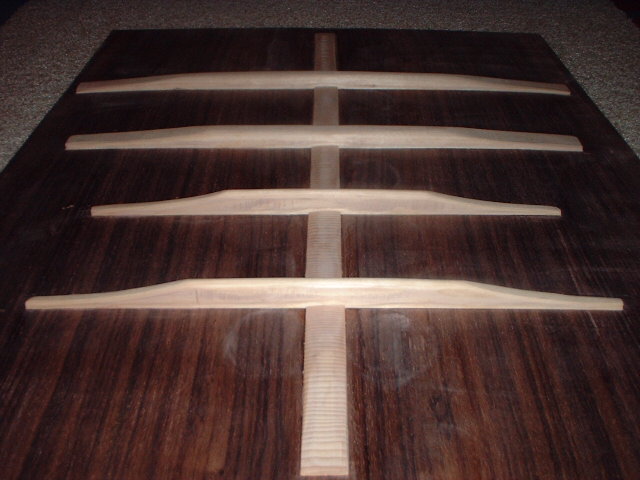
These are the spruce bracing strips on the inside of the back of the guitar. They are quite thin but strong because the grain runs across the joint. They reinforce the joint and have gaps to allow the tone bars to cross.
|
|
|
|
The four back spruce tone bars are glued into place and clamped.
The tone bars have fairly dramatic curves sanded on the bottom and therefore after the glue dries the bottom panel curves up at the sides. This gives strength and stops the panel from collapsing in when the strings are tensioned.
The shape and placement of the tone bars have evolved over time and have a dramatic effect on the sound of the guitar.
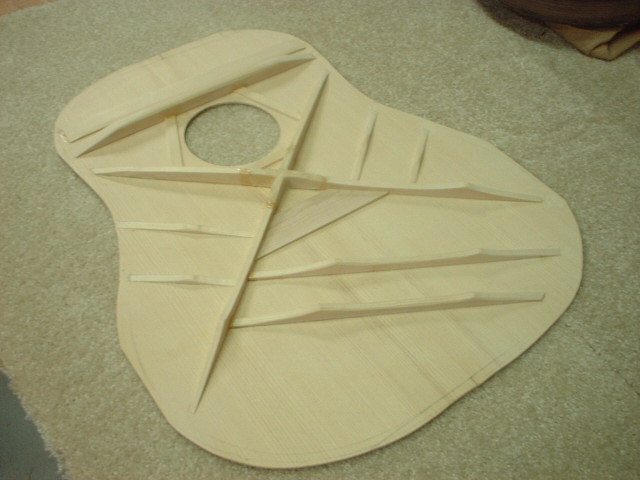
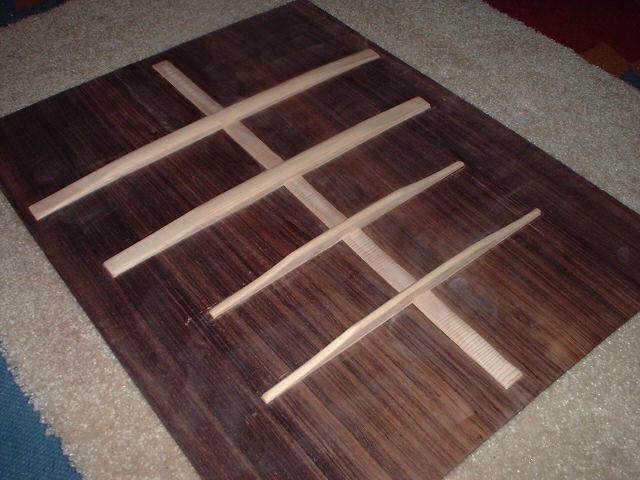
This plan follows the classic Martin design. It took most of an afternoon to cut and shape these tone and bracing bars for the underside of the top. The grain orientation of each strip is critical so it provides the correct support and doesn't hinder the tone. I had to make the two big cross pieces twice as the angle is not 90 degrees as I had initially assumed... All tone bars except the sound hold bracing strips and the two thick pieces on the right are curved in a similar manner to those on the bottom to generate a curve to the top.
|
|
|
|
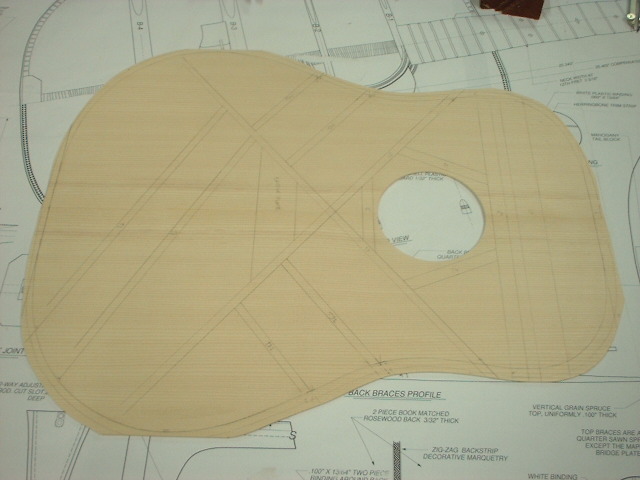
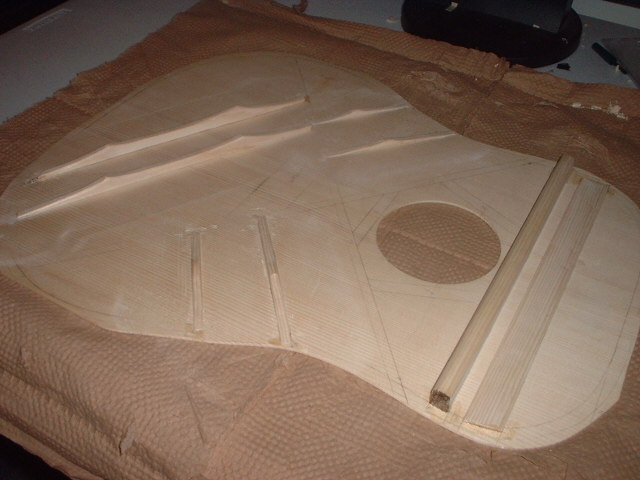
This shows the sanded underside of the top, with the position of the tone and bracing bars transcribed from the pattern.
I tranferred the outline of the built sides onto the top. The inside line is the actual edge, the outside line is my "safely away from the edge" cutting line. In another butt-clenching moment, I finally made the cut on the top. You can see that I cut a bit outside my safe line, just to be extra extra safe.
|
|
|
|
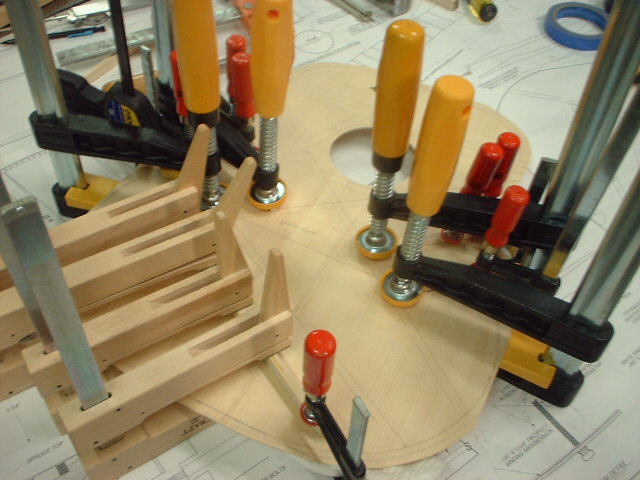
I've glued the first set of tone and bracing bars to the bottom of the top using heated hide glue.
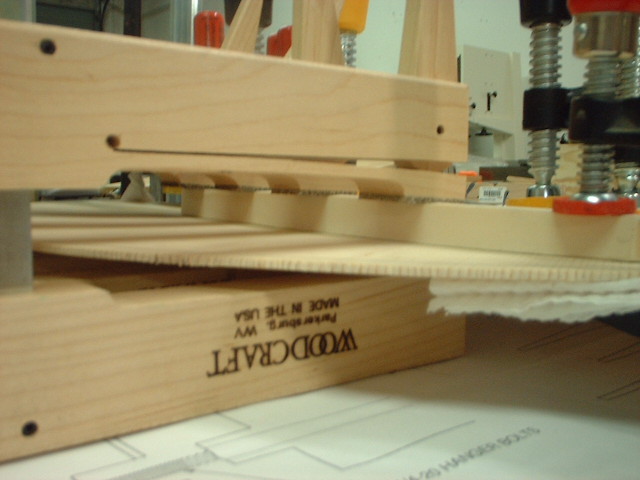
I went a bit nuts and bought some very deep clamps - the yellow handled ones use conventional metal screws and the ones on the left are wooden and have a cantilever to apply pressure at the end. Here's another view of the cantilever clamp.
|
|
|
|
Following the pattern, I carved the tone bars to the proper shape.
This shows the tone bars fully glued and carved. There is a glue-impregnated cloth reinforcement patch at the cross point of the two major bars and a flat maple plate that supports the bridge that will be glued on top.
|
|
|
|
Eight small spruce reinforcing strips are glued to each side half to provide cross-grain support.
I started carving the braces on the back before Christmas. After a very long break, I finished the carving and sanding. Swirl marks are just leftover dust, not to worry.
|
|
|
|
Another angle of the back braces. I cut the back to the proper outline and did final shaping of the ends of the cross braces, carving them down to just a sliver at the ends where they will intersect the kerfed
lining on the sides.
|
|
|
|
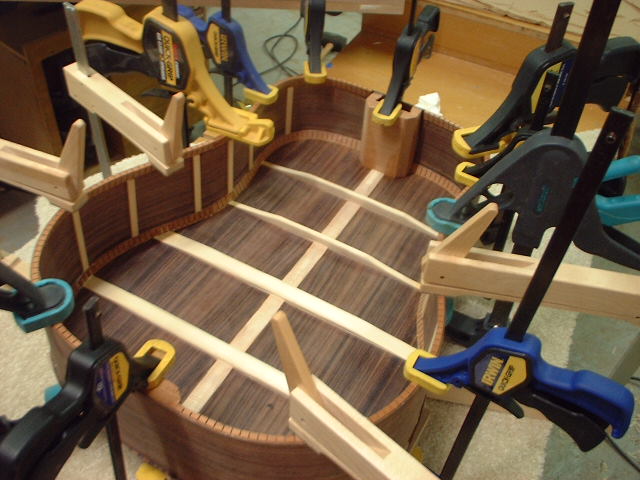
And here is a major milestone - the back is glued onto the sides. The top's braces and tone bars get a final trimming, leaving them paper-thin where they will touch the kerfed lining.
|
|
|
|
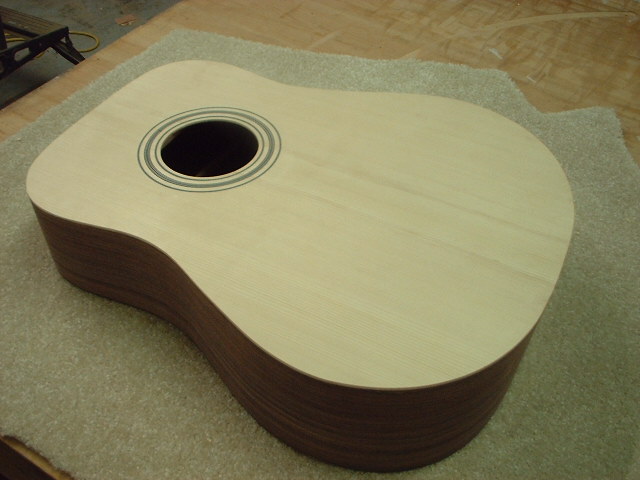
The top is now glued to the sides, with plenty of cauls and clamps. We now have something that resembles a guitar body.
|
|
|
|
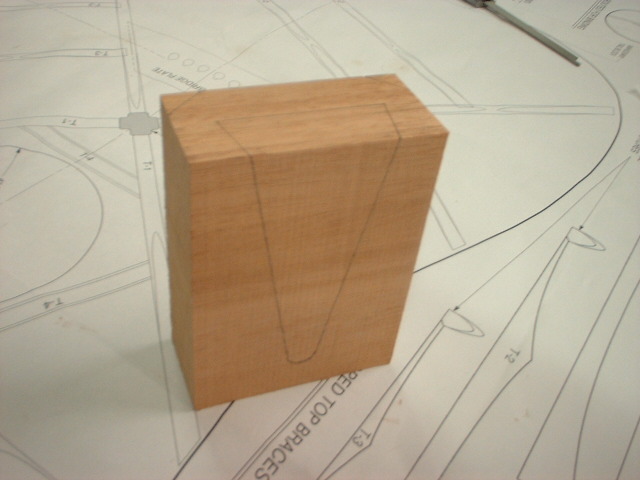
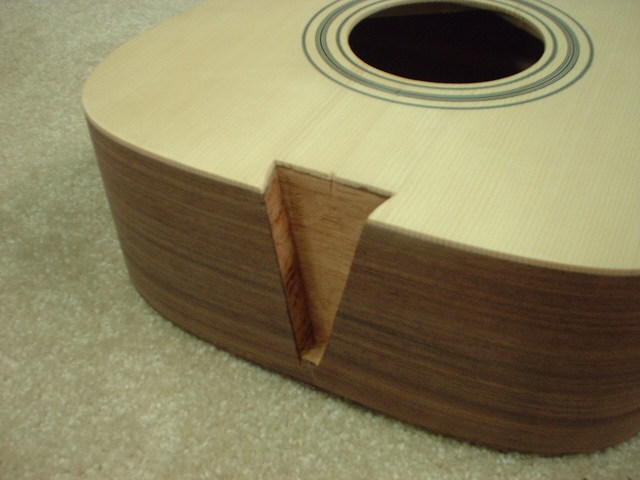
I then trimmed out the extra top and side material where the neck's dovetail will slide in. Now I shift gears and begin work on the neck.
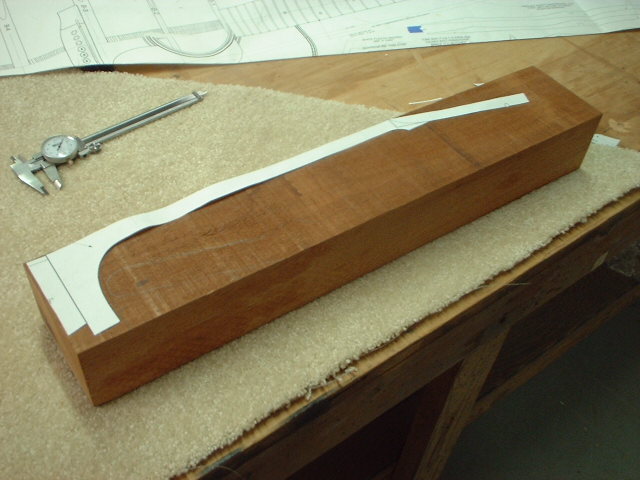
It starts as a solid block of mahogany. I use the template to cut two necks.
|
|
|
|
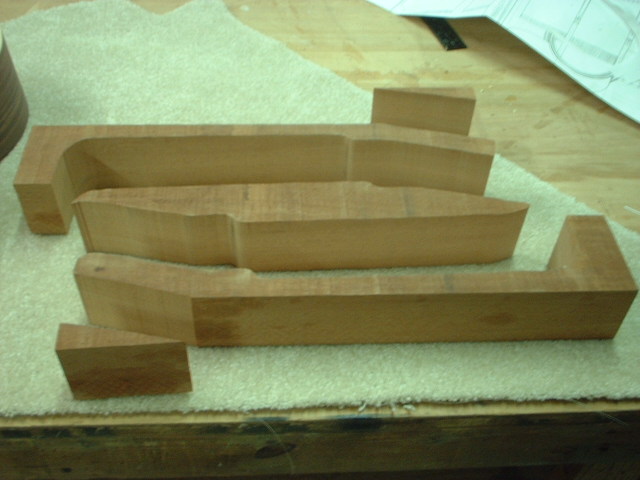
I now have two rough necks and a little waste mahogany - but I can use that for another project later.
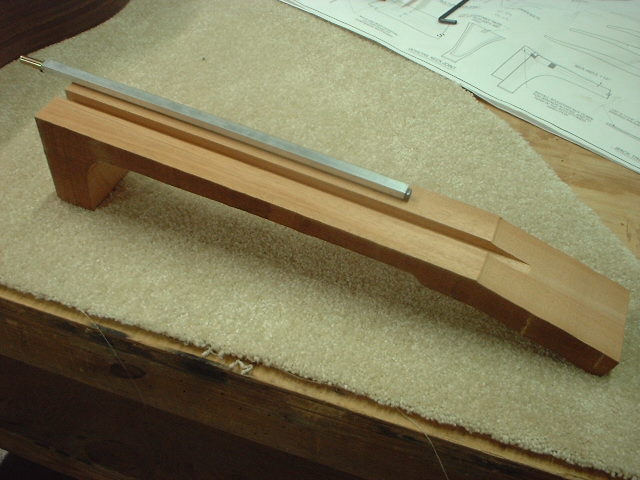
I've jointed the top of the neck flat and cut a dado to fit the truss bar. Turnnig the screw on the truss bar slightly bends the neck to bring it flat after the strings are tensioned.
|
|
|
|
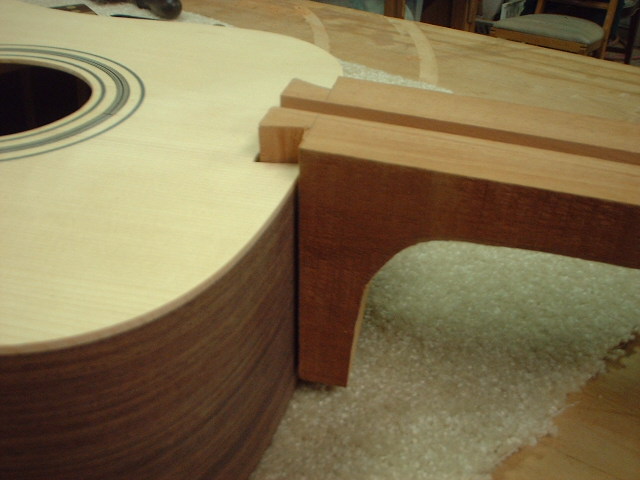
I've marked out the critical lines making the dovetail shape, then start to cut and carve it. This is the first try to fit after initial cut.
|
|
|
|
This is the technique I used to fit it as tightly as possible. Since the joint is totally blind, I used a small piece of carbon paper:
- position carbon paper in joint
- gently tap down with rubber mallet
- remove neck and carefully chisel away anything with a carbon smudge
- repeat
|
|
|
|
|
|
Due to the limitation of the program I use to build the web site, I have to continue the pictures on a second page.
|
|
|