|
|||||||||||||||||||||||


 |
||||||
|
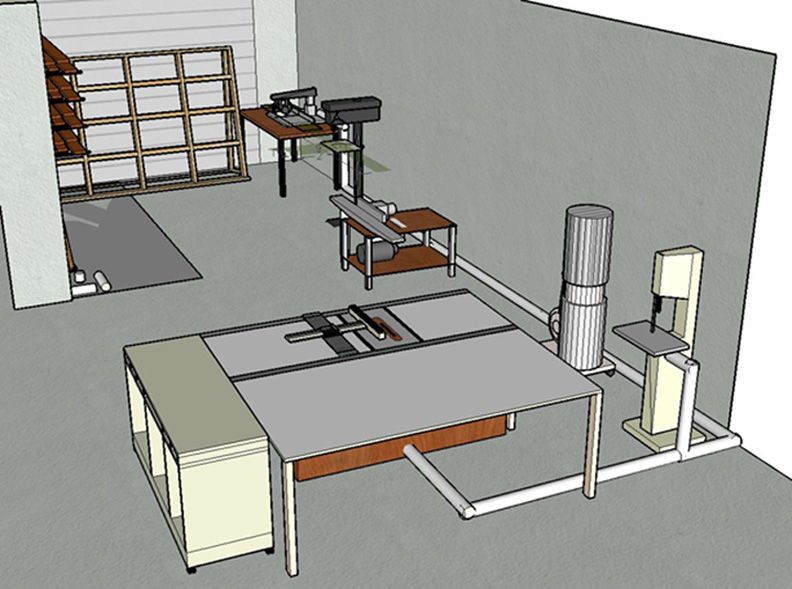
My shop used to be in the right-hand side of my 2 car garage, where my car used to be parked. I have now moved into a beautiful workshop that I'm splitting the rent on with Mike Wilson and Joe Gallio. The pictures of the shop are below. The space is about 20' by 60' and it's great to not have to worry about moving everything out of the way all the time or not having enough room to make big cuts or assemble something huge. It does have air conditioning, but it can't quite keep up with the Texas sun blasting down on the roof in the summer so fans are important too. These pictures show the newest generation of the layout and tools. At this point I feel fully moved in and am able to really crank through some projects. The first image is a work-in-progress 3D model of my shop space and the tools in it. I built it using SketchUp, a fantastic application used by architects and designers. I was looking for a tool to model my projects and thought making a mockup of my shop would be a good test. SketchUp offered a free 8 hour evaluation period and I managed to get a lot done in those 8 hours. Since I couldn't justify $495 for my little hobby, I sent them an email and went to a SketchUp demo night here in Austin and suggested that they produce a 'lite' version for ~$100. Well, on March 14 they were acquired by Google, and on April 27 they announced a free version! The full-featured "Pro" version still costs $495. Here is a rendering of my shop space, minus the router table and wood storage system that I haven't updated the model for. I highly recommend grabbing a copy of SketchUp! and trying it out! They have a 3D Warehouse of models that people have built and contrinbuted, and they even have a plugin for Google Earth so you can build a model of anything on Earth and display it at the correct location. |
||||||
 |
||||||
|
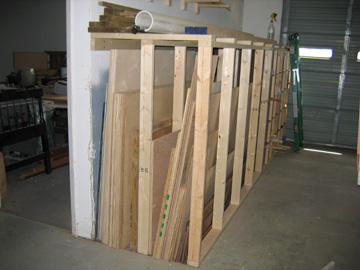
As you enter and turn hard to the left you see the rollup door entry into the shop area. I've got my stuff lining both walls here. I built in a sheet goods storage area that can take 4x8 sheets and special 5x5 sheets. It's built with 2x4s and is screwed into the wall studs and concrete floor so it's very solid. We also use the top as a storage area for long, heavy planks. |
||||||
 |
 |
|||||
|
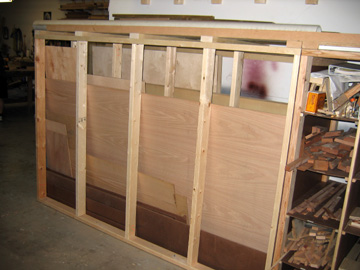
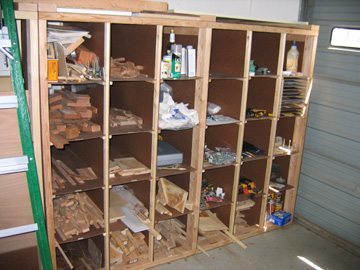
I've made a stock rack on the wall above and a cubbyhole system between the end of the sheet goods and the front wall of the building. I use the cubbies to store small pieces of wood, tools, finishing materials and sandpaper in a special sheet holder at the end. |
||||||
 |
 |
|||||
|
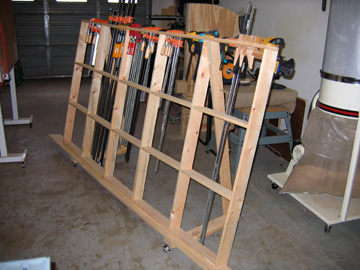
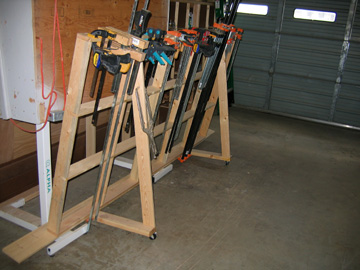
I build a rolling sheet cutting jig in order to be able to cut large pieces of plywood by myself. When I place a sheet on this, I can mark a line or clamp an edge clamp and make the cut with a jigsaw or a circular saw. The back side makes a wonderful clamp rack too. |
||||||
 |
 |
|||||
|
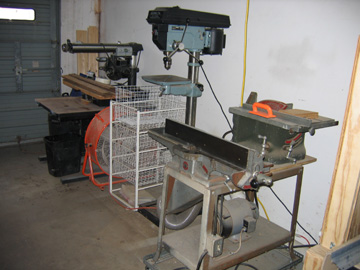
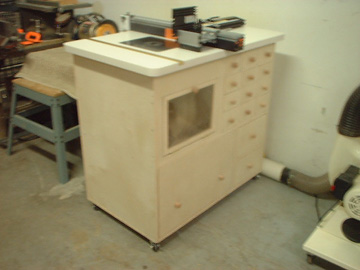
Moving to the opposite wall I have a radial arm saw that I bought used (and haven't renovated yet), my drill press and a 1953 Delta/Milwaukee/Rockwell 6" jointer that I have on permanent loan from a neighbour down the street. It was in pretty rough shape, but I cleaned it up, levelled the infeed and outfeed tables and had the blades sharpened and now it works very well. It came mounted on metal frame with an ancient Shopsmith table saw. I added a custom dust collection system on because I was tired of sucking up the shavings by hand. Next comes the new router table (sorry for the focus). |
||||||
 |
 |
|||||
|
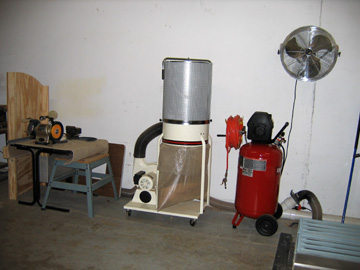
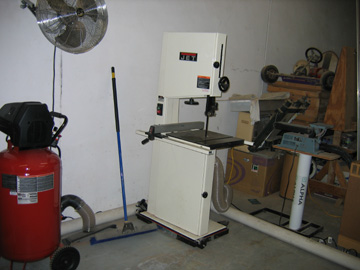
Then comes the dust collector (you can just see the 4" PVC piping I used to connect every tool I have to the central system), air compressor and fan (can't have too much air movement in Texas..) Next comes the bandsaw. |
||||||
 |
 |
|||||
|
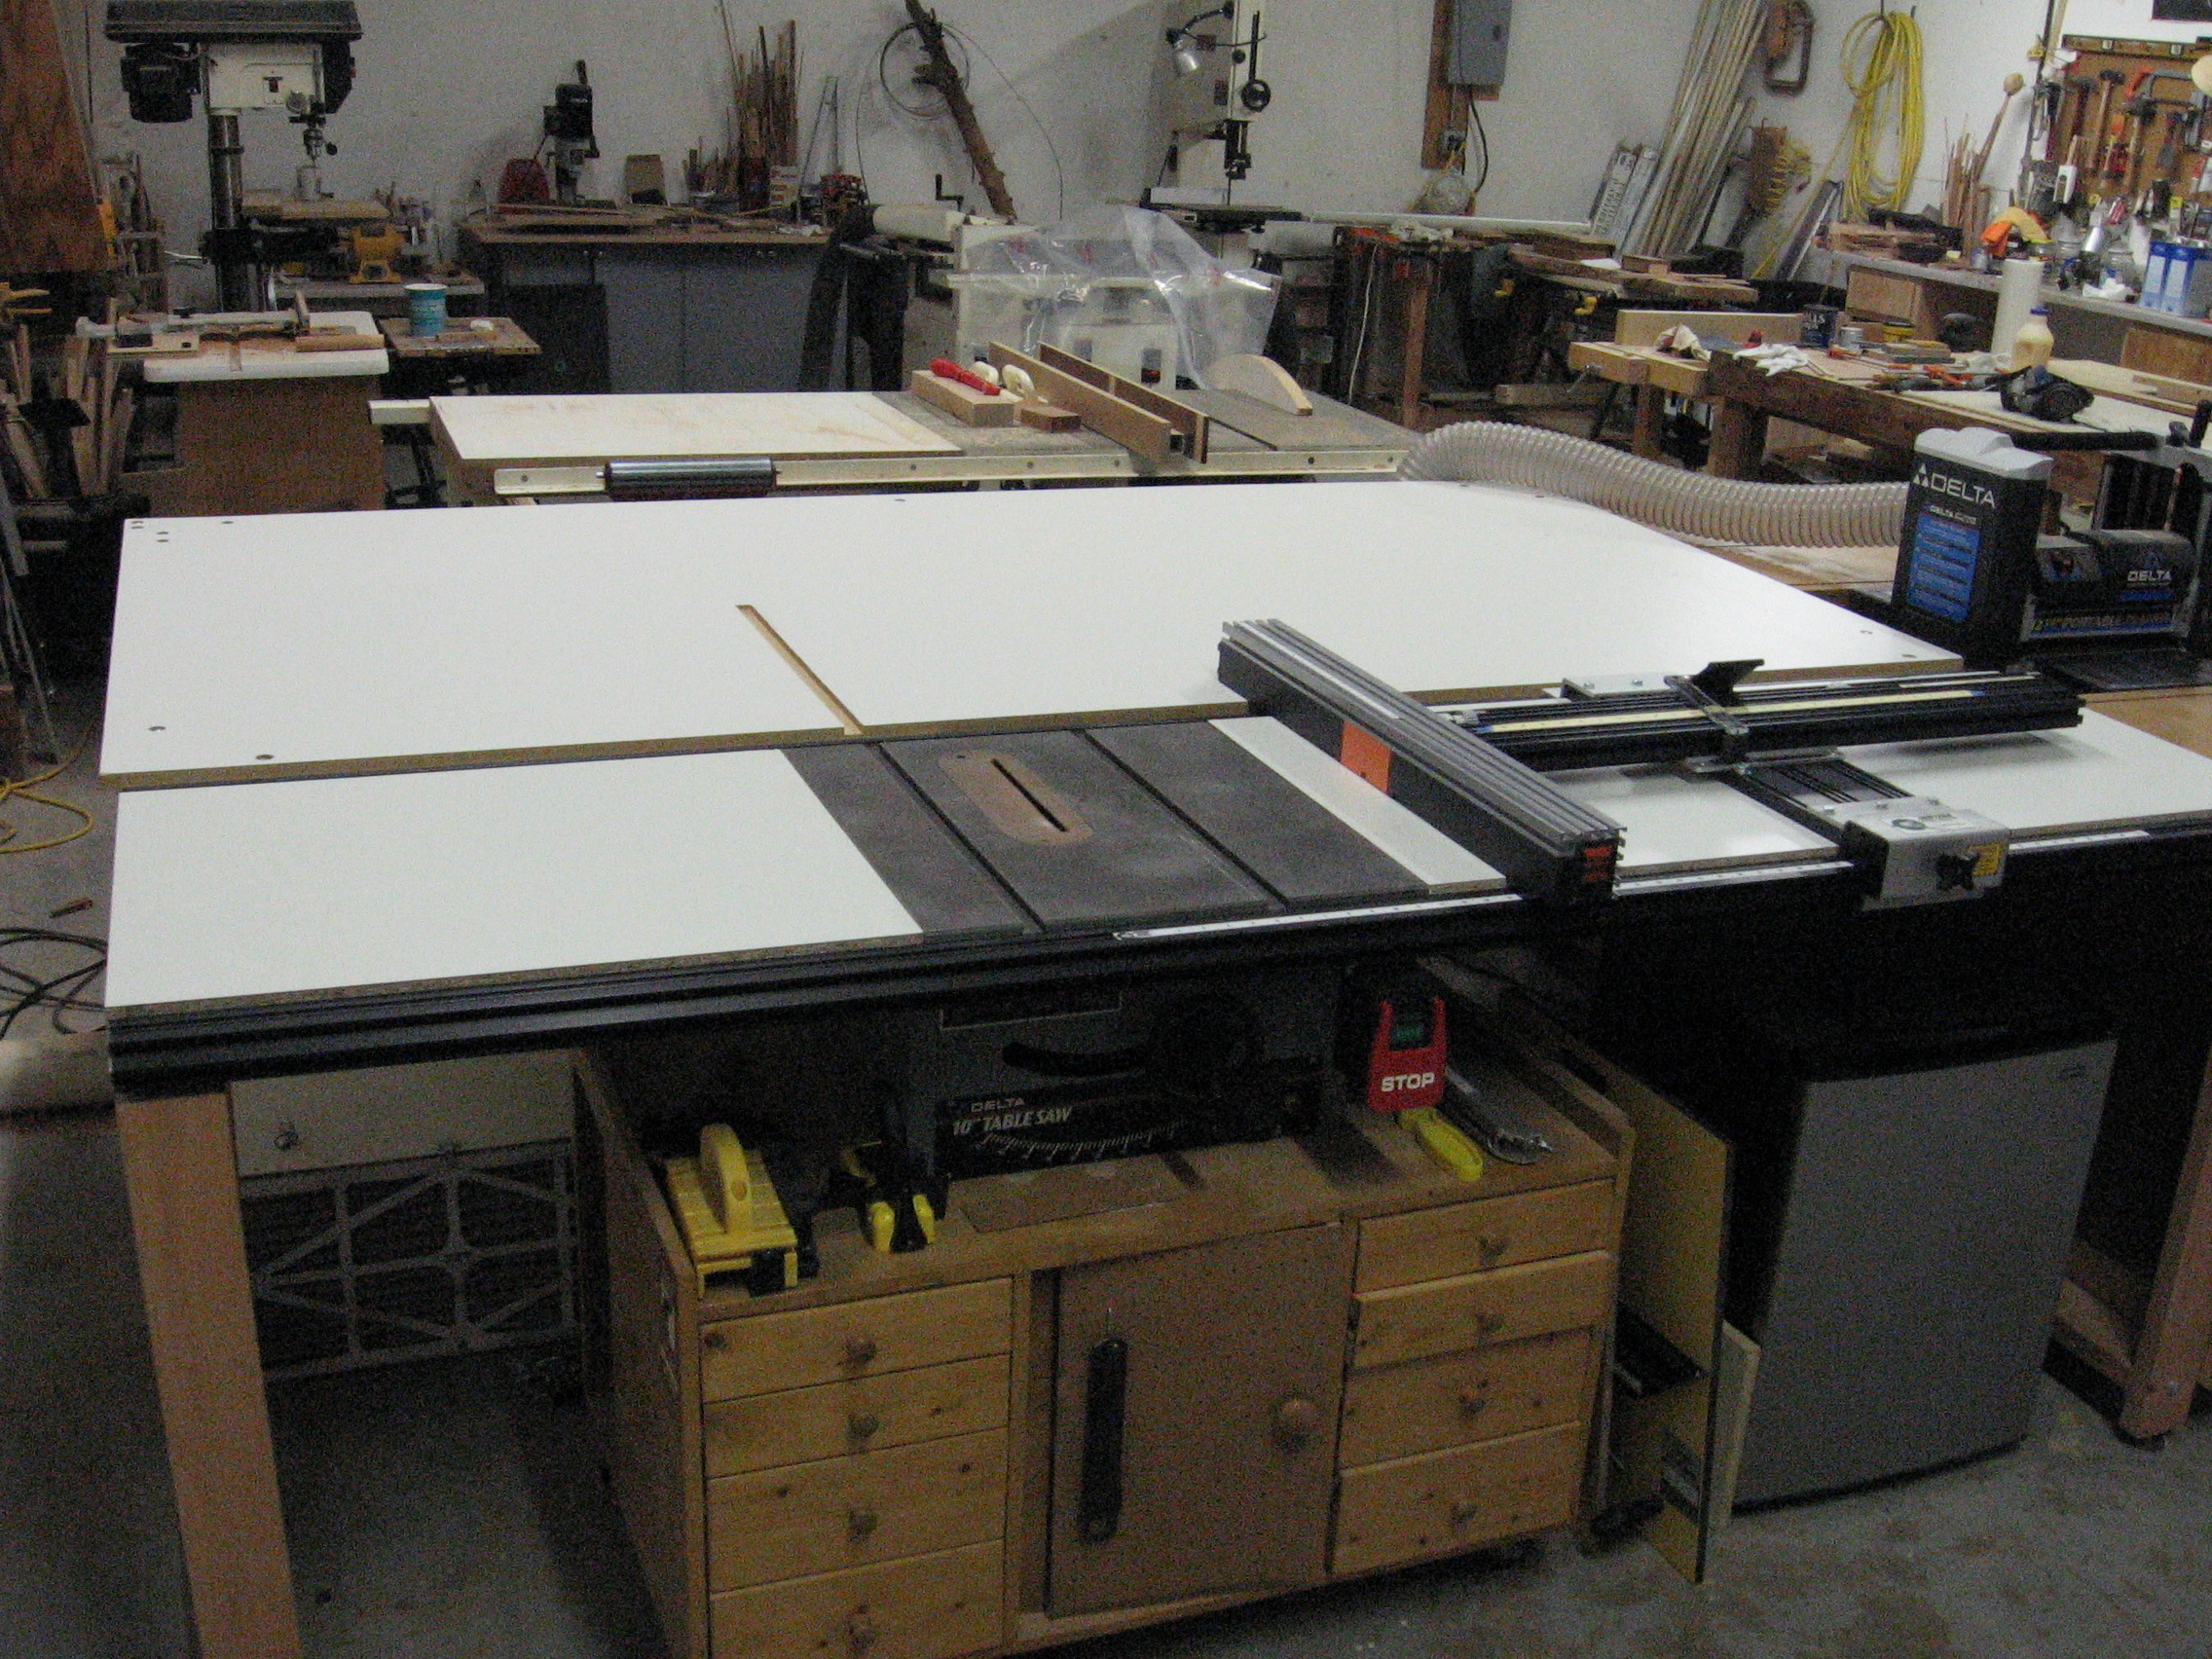
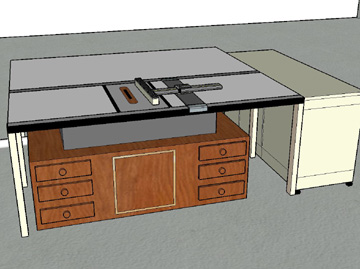
Next is my table saw that has now gone through three generation of upgrades. First generation was simply the saw out of the box. Second generation was mounting it onto the saw cabinet. The third generation was quite a jump - I bought an 8' Saw Train rail and bridge kit from Jointech and used it as a frame to do full 8' wide melamine right and left extension tables, then bolted a full 4' x 8' sheet of melamine on the back as an outfeed / work surfact. I then bought another Clincher / Smart Fence combo from Jointech. I can make anything up to a 26" cut with 0.001" accuracy. If I need a wider cut, I loosen the bridge and slide the whole assembly as far as 5' to the right. The left image is reality, the right image is my SketchUp model. |
||||||
 |
 |
|||||
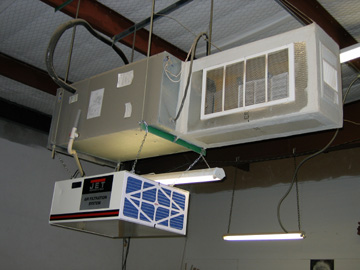
|
Last is some lung insurance - a ceiling-mounted air cleaner hung below the a/c unit.. This constantly filters the air to catch the fine dust kicked up that doesn't go directly into the dust collector. Since it's meant to be up in the air, it comes with a remote control and also has a 2, 4 and 6 hour timer settings. |
||||||
 |
||||||